Uncategorized

Cricut Commands: Flatten, Attach, Weld, Slice

Hi guys!

Today I am so excited to be sharing with you this little mini tutorial the commands for Design Space. When you are new to the Cricut world, learning the software can be the most difficult part. However, after today you will learn how to manipulate images as you wish. Without further ado let’s get started.

Flatten: Have you saw the flatten button on your toolbar but didn’t know what it was for? You’ll have to wonder no more. When you flatten an image, you are taking multiple layers and converting it to a single image. This is used if you want to do a print and cut. This makes life so much easier when you are making decals, stickers, ect. This will give you the different colors that you would like without it cutting out every since piece by color. Recently I used this on printable vinyl to make a sticker for a cup that I was epoxying. It worked like a charm!

Attach: When you attach something you are combining different layers. They will stay in their relative positions and move a group. If you resize, then it will resize evenly as one piece though there may be different elements. You may wonder then how this is different from a group. When you group things together it will do the same thing. The difference comes when you send your project to the mat. If it is attached it will stay exactly as you have it. However, if it is set to group, the software will rearrange it on the mat to save space. If you want to have one piece cut exactly as you have it then attach is your tool. If you want to change something you can always tap the button again to unattach it.

Weld: Weld will take and merge together two objects where they overlap. An important thing about welding is there is no undo button. You can only undo it if you tap the “Undo” button right after doing it. If you decide later down the line that you want to do something different it will be too late. I love to use the weld tool when using a script font. A lot of times even after adjusting the letter spacing the word doesn’t look right. I can then ungroup the words fix the ones I need to then weld the word back together. This way the overlapping part of the letter will not be cut out of the next one.

Slice: Lastly, we are going to talk about slicing. This is probably the tool that I use most often. There is so much that you can use it for. If you want to cut text out of a shape, you use the slice, if you want to cut one shape out of another, you slice. The slice option will only appear after you select 2 layers. Please note that you can only slice 2 layers at a time. You can select 2 layers either by dragging a box over the two layers or selecting one layer holding the ctrl key on your keyboard then selecting the other layer.

Well, that wraps it up for today! Thank you for taking the time to give this a read through. If you have any questions please don’t hesitate to comment down below. Until next time have a craftabulous day!

Uncategorized

Downloading Free Fonts for Design Space – Windows 10

Have you seen all of these beautiful fonts on various projects but when you go into Design Space you are disappointed because you have to pay to use different fonts? You will no longer have to worry about that with this easy tutorial. Please note that this tutorial is for Windows 10.

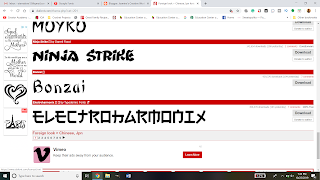
So first you need to find some free fonts. There are many ways that you can go about doing this. Personally, I always use dafont.com but there are many other websites out there. Some other websites are:

If you would like a full list then you can go to your favorite search engine and just type in free fonts or free font websites. As mentioned I love dafont.com so I’m going to be using that for this tutorial. So after you get to the main page you want to find what kind of font you are looking for. If you are going to use the font and sell products then you need to make sure that it has a free commercial license included.

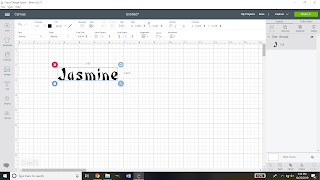
For this example, I am going to use the Bonzai font. You need to download the file. On this website, you can see it on the right side of the screen.
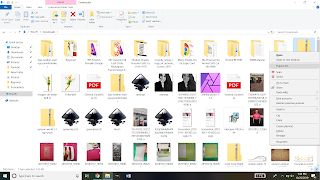
Once it is downloaded then you need to find the file on your computer. It will come as a zipped file. To be able to use it, right-click on the folder then click extract all.
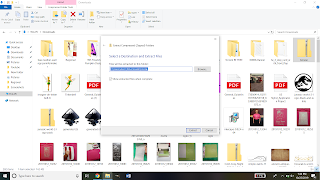
When the dialogue box pops up, make sure the file is going to be where you want it to go and click extract.
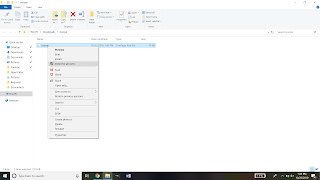
When the file is done being extracted then it will open a new window with the extracted folder. You then want to right-click on the font file and click “Install for all users”. You will then see a status bar go across until it is completed. If the font you pick has more than one font file you will need to do this step for every file.
Now your font is installed and ready to use. If you already have design space open you will need to save your progress and close the window. Then reopen it. This will refresh the fonts.
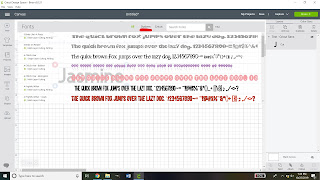
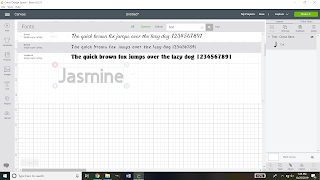
When you open your fonts you want to click the systems tab. This will open the fonts that are installed on your computer.
If you do not want to look through the list for it then you can type the name of the font into the search and click on it.
That’s all there is to it!
I hope that this tutorial was able to help you. If you would like a tutorial on how to install custom fonts on your android device then please leave a comment below and I’d be happy to make another tutorial. Until next time, have a craftabulous day!
Uncategorized

Gifts for National Boss Day?

Tomorrow is National Boss Day. Are you stumped on what you can make to show your boss some appreciation? Today I am going to show you an inexpensive gift that you can make for your boss. If you know that they like coffee or cold beverages then you can make them this awesome cup. I have two different versions that you can use.

Click the link above to be taken where you can download them. In order for this work properly, you will need to make sure that it is 3.944W X 3.75H. If you choose to, you can add your boss’ name and slice it out.
***~~~ You can use my designs for personal use. Any commercial use MUST include a link back to my blog. ~~~***
That’s all for today folks! Talk to you soon!

Uncategorized

Make a Shirt with Glitter HTV like Pro

This tutorial is going to show you step by step how to make a shirt using Glitter HTV.  Without further ado, let’s get right in.

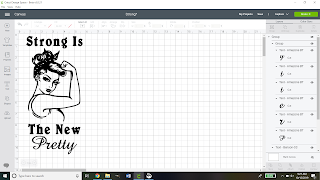
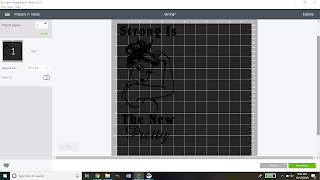
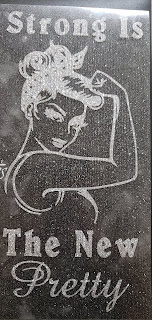
First, you want to start with the image that you are going to use for your shirt. I found this lovely pinup girl and then added a sentiment that I really liked. Once you have everything all set up click the make it button.

Then we want to make sure that it is on there just how we want it. This is important: DO NOT FORGET TO MIRROR THE IMAGE!

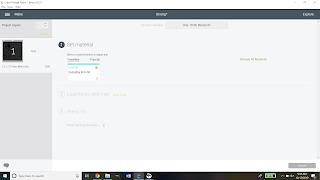
Because glitter HTV is thicker than traditional HTV we need to have it on a different setting. So you want to hit the continue button then set your Cricut to the custom setting. When you do so you will see this:

You then want to click browse all materials and search for glitter iron-on.

When you have done that you will see a screen like this:

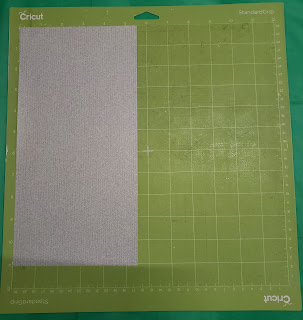
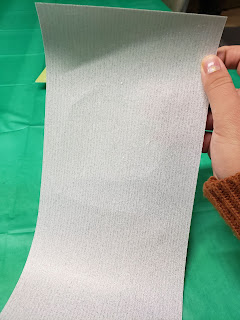
This is your chance to check all of your settings to make sure they are where they are supposed to be. If you notice there is a pressure drop-down box. You can decide if you want it to be a default, light, or heavy pressure. The Siser glitter HTV is very thick so I opted for heavy pressure. Now you need to get your vinyl ready. I used the guide on the digital cutting mat and cut my vinyl 11 X 5.5. I then applied it shiny mat shiny side DOWN. Always apply the shiny side of the vinyl against the mat.

Then you want to load your mat and start to cut. Depending on how intricate your design you wait for it to finish cutting.

So now that it is all cut you can take it off the mat. So now comes the fun and time-consuming part. You need to weed, or remove the extra vinyl. I find it easier by taking the extra around the edges before doing little details then I use the picture on my computer to help me find what I need to weed out inside the image.

When you are done it should look like this:

Not that is done you want to arrange your shirt and heat transfer pillow right where you want it. It is important that you wash and dry your shirt without fabric softeners before continuing.

Next, you need to know the temperature that you need to use so you can use a quick search on google like so: 
You then want to set your heat press to the temperature and time and then let it warm up. Before you start applying the HTV you need to pretreat the shirt. To do this you need to hold the heat press to the shirt for 15 seconds after it has warmed up.
Then you want to carefully apply your decal just how you want it to be on your shirt. Make sure that it is even.
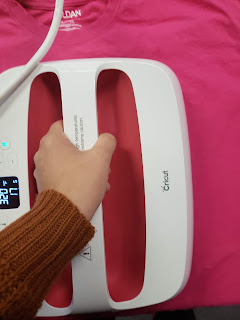
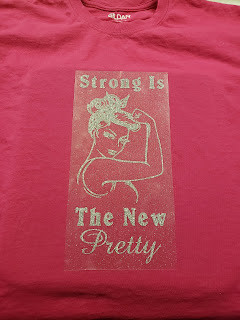
Then you want to apply either a Teflon sheet or parchment paper to the top of your design and then press it. It will probably take more than one time of pressing. When you start to peel off the clear plastic you want to make sure none of the edges are peeling off. After you get the plastic carrier sheet off you want to press it one or two more times just to make sure.
Then you want to flip the shirt inside out and press again. This is to make sure that it stays. Then that is all, you’re done.
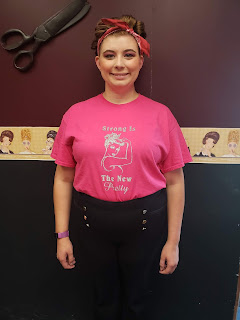
Then you get to wear and enjoy your beautiful creation. Just remember that you are not allowed to wash it for 24 after attaching the vinyl.
That’s all for today! Until next time have a craftabulous day!
Uncategorized

Personalized Gift Basket for $25!!

Welcome back! I have been planning this post for a little while but had to wait to post it. I made this gift basket that I was super excited about but didn’t want it to get back to the couple. So let’s jump right in.

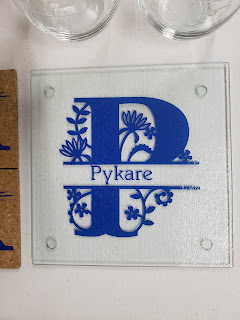
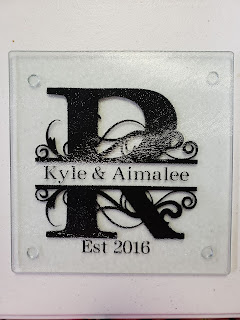
So first up is this beautiful split monogram cutting board. I had been watching various youtube videos trying to find an idea of what to make them. One of the first videos that I came across was how to make a custom cutting board. Believe it or not, the glass cutting board was actually bought from Dollar Tree. How cool is that!?! So this gift is so easy to do. I designed it on Cricut DesignSpace. I use Oracle 651 vinyl because the color is on both sides. When I cut the image I mirrored it so that I could attach it to the bottom so they could still use the cutting board. When I applied it I used a ruler as a squeegee to make sure there were no bubbles and voila, this one is done.
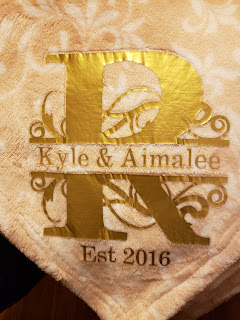
So for my next part of the gift I bought this luxury plush blanket from Dollar General. I love how soft it was and since it is starting to get cold weather a blanket it seemed like a great idea. I used the custom monogram that I used above but put it on some gold HTV and applied it using my easy press 2.
Next, I made this beautiful tray. Lately, I have been really into these Split Monograms so I wanted to use this again. I wanted to add a little spice to it though so I added the leaf frame. I spray painted the tray black then added the details in a light blue Oracle 651 permanent vinyl.  After I let it fully cure for 48 hours I sealed it a clear coat by Rustoleum. 
The last part of my gift was these adorable coffee mugs. I bought them at Dollar Tree. I looked online trying to find the perfect saying. Then I found these and I loved it so much. It perfectly describes my friends. I made sure they were fully cured before giving them away so they would be able to be hand-washed.
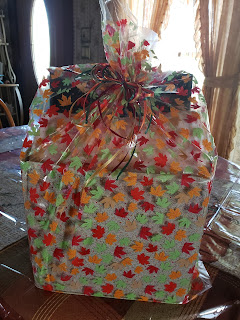
I packed it into a collapasable cube and a gift basket bag and it was ready to go! If you would like to have a step by step tutorial on how to make any of these items then let me know in the comments below. Until next time, stay crafting my friends!
Uncategorized

Personalized Starbucks Cups for $5!?!

Thank you for joining me again today. If you want a personalized cup but don’t want to spend big bucks then you have come to the right place. I am a barista at Starbucks. We are encouraged to use reusable cups for our drinks while we are working to reduce the amount of plastic that is thrown away and to save our Earth. In the past, I have tried a couple different designs on my cup and haven’t found one that I absolutely loved and have had problems with the vinyl bubbling. So this morning I decided to take a different approach. If you have seen any of my recent posts you know that Autumn is my favorite season. So I decided to do an Autumn inspired cup. You can see what came up with below:

I absolutely LOVE this design. If you would like to know how I made this then please keep on reading. One of the things I like about Starbucks is that if you bring a reusable cup in with you, you get 10 cents off for helping to save the planet. Naturally, Starbucks has its own reusable cups that you can purchase. Of course, the prices vary where you live, but the cold cup that you see above around me is only $3 plus tax. That is really a good deal. It is made out of hard plastic and the lid actually fits securely on there so that there isn’t any leakage. If hot drinks are your game they also have reusable hot cups for around $2 plus tax.
So far you have $3 invested in this project now, you just need to decorate it. Since in the past, I had a problem with Cricut permanent adhesive sticking to the cup I went with a different vinyl this time around. I bought Oracle 651 permanent vinyl. I love this stuff because it works really well, has a shiny finish, and…. it is only $2 per 12 X 12 sheet at Michaels. They recently had a sale that each sheet was $1 so I bought a lot of colors. If you want, on this brand you can also use a coupon if it is not on sale which is nice.
So since I knew that I wanted it to be autumn-themed I picked a dark red and orange. Now for the fun part. So for the around the siren logo, I found a free SVG that looks like fall leaves. It was actually a set of 2 different frames. You can find it here. So I just had to decide which one I wanted so I picked the first one. Next, I had to get the right sizing for around the logo. This could be challenging because the logo is actually an oval, not a perfect circle. I wanted to leave a tiny bit of space between the frame and the logo. So the custom size of the frame was 5.306″ wide X 4.917″ high. 
When doing the name I looked through the different fonts that I had on my computer. I wanted the name to stand out so I picked the bright orange vinyl. I am also a super Star Wars nerd, so I ended up using the Star Jedi font from dafont.com. (If you want a link to the font click here.) I picked the one Star Jedi Outline found out of that bundle and cut it using my Cricut.
When I did the weeding I started with the leaf frame first. I didn’t want to waste vinyl so I took the leaves out carefully as I was weeding and set them aside on some leftover backing from a different vinyl sheet. This way I could use them again and finish decorating the cup. I applied that directly to the cup using transfer tap as carefully and evenly as I could.
Next, I started weeding out the letters and put them on the opposite side of the cup where the boxes are and lined them up. 
Lastly, I took those leaves that I had saved and put half the amount on one side, then the rest on the remaining side. Then, Voila! My custom Starbucks cup. You can use the same color vinyl for everything if you want, totally up to your preference. You still have a lot of both sheets left for another project. So $3 for the cup plus $2 for both sheets of vinyl equals a custom cup for $5. 
I hope that you enjoyed this little tutorial. If you did please comment below and I’ll make some more instructions like this. Until next time, have a craftastic day!
Uncategorized

HTV? What is that?

Hi everyone! So today I’m going to talk about HTV. What is HTV? You may ask. It stands for Heat Transfer Vinyl or simply iron-on vinyl. When you have a Cricut the sky is literally the limit for all the different things that you can create. I have to admit that when I made my first couple of shirts (Pictured below) I was terrified.

I had no idea what I was doing and everyone was using their fancy easy press. The trick that I have learned is patience. To use a traditional iron is time-consuming, however, it works just fine. You need patience also with yourself. When you first start designing and apply your t-shirts there are going to be mistakes you will make. You can’t let those mistakes discourage you from your goal. You have to learn from them and try again. That is how we learn everything from walking to our chosen trade. This is no different and you will get there if you keep going.

If you are new to the Cricut world and are using your home iron it is important to know that for most types of vinyl (all the ones that I know of currently) require you to set your home iron to the highest setting. You also need to set it to the DRY setting. You NEVER use the steam setting when doing an iron-on transfer.

Also, make sure that you wash your shirts and dry them without fabric softener. You want to get the coating off the shirt that comes from the manufacturer. If you use fabric softener it is again putting a coating on the clothing that will give you trouble.

When using the older style iron on transfers the idea was to keep the iron moving. That is not the case with HTV. Instead, you want to press the iron down for 15 seconds before lifting it up and moving to a different area. This will prevent wrinkles in the fabric and vinyl.

If you are doing multiple layers of vinyl you must be careful. When you weed the vinyl it comes on clear transfer tape. Please, please, please learn from my mistake and make sure the clear plastic from a different section is under the vinyl. I cannot tell you how many times this happened to me because I was in a hurry.

Most importantly have fun with it! We craft to calm our anxieties or to relax. We don’t want to stress out so much that it no longer is fun. We want to enjoy the destination, or finished project, for sure but we also want to enjoy the journey as well. Before I close out for the day I want to share with you another shirt that I made at the beginning that I am proud of. It gave me so many problems, such as putting the vinyl on the clear transfer tape, but in the end,  it was worth it and is one of my favorite shirts. Until next time, stay crafting my friends!

Uncategorized

Super Smash Trophy!?!

Hey guys! So I have another exciting post for you today. So my husband today is having a super smash tournament with his friends today. So earlier this week he asked me if I could make him a trophy to give to the champion of the tournament. I thought about it for a couple days and looked online trying to find some sort of inspiration…well I didn’t find very much. I found maybe 2 trophies and they were 3D printed or you could buy it on Etsy for $30. So I thought to myself how could I make something that wouldn’t break the bank? So this is what I came up with.

It may look super complicated but it totally wasn’t. So the base of the trophy is a 5X5 round plaque that I bought at JoAnn Fabrics. I used a 50% off coupon and got it for $1. If you are looking for one you can find it here. I loved the detailed edging of this one. Then I used black glossy spray paint to give it a more finished look.
For the gold stand, my adventure took me to dollar tree where I found a package of three glass candle holders for $1. So I went ahead and picked that up. When I got home I got the one I wanted to use out of the package and use a metallic gold Rustoleum spray paint that I had from another project and used that to give it that first place feel.
For the Mario on top, there were many different ways that I wanted to do this but I figured that simple was probably best. I searched store after store to find a little 2″ Mario with no success. So then I turned to the internet and found a set of 18 Super Mario Action Figures all of them that were 2″ tall. You can find that set here. The set was $12.99 but I plan on either using them for cupcakes later or just selling the rest in my local buy sell trade. Then I used Gorilla Glue Epoxy to glue everything together.
I was almost done and so excited about my creation but I still needed some words on the trophy. So I downloaded the official Super Smash Brothers Font and cut it out with my Cricut on a permanent vinyl sheet and attached it. Then voila it was complete. I hope this is helpful in case anyone else wants to make a trophy but doesn’t want to spend a ton of money. Until next time, have craftabulous day!
Uncategorized

Fall in love with Autumn

Hello everyone! Welcome back to my blog. So today I wanted to show you something else that you can make with the Cricut. This is probably my new shirt. You may not know this but Autumn is my FAVORITE season. I love the crisp air and beautiful leaves. Basically, I just love everything about it. Since Autumn officially starts on Monday I wanted to make a shirt in preparation. So here is a picture of my finished product.

This may look complicated at first but it is so worth it. The words in black are all 1 piece so that makes it easy. The leaves and words on the sides are in four different colors. I used orange, gold, medium yellow, and medium/dark green. The leaves are very easy to apply. The hardest part of the project is trying to align the “I live for autumn” and keep it straight but once you have it, you’re golden. The shirt is antique cherry red by Gildan that I bought at Michael’s for $2. If you are looking for the SVG file, you can find it here. That’s all for today. If you have any questions please send me a message. Talk to you soon!

Uncategorized

New Favorite Craft!

Hello everyone! It’s been a while! Things have been super crazy but I’m back. I wanted to share with you something, a device that has changed my crafting life forever. That is the Cricut Explore One. Yes, it is an older machine but it is AMAZING! I have always wanted a Cricut especially when I started doing card making but they were just so expensive. I was looking through the local facebook marketplace and I found one for $80. Since then I have done so many different projects. So from now on, I’m going to share some of the different things I have created. If you wanted a tutorial on how to make these then please let me know and I would love to make one for you. Today I want to share with you my very first project.

The best part of this project is that it is great for a beginner and it is inexpensive. You can get these reusable cold cups from Starbucks for about $3. Then all you need to do is buy Permanent Vinyl.