cosplay · sewing

Sprinkle Some Pixie Dust with This Enchanting Tinker Bell Cosplay

Hello Everyone! So I’m really excited about this post today. So I was in a thrift store a couple of weeks and saw this beautiful tablecloth. It was green and had a beautiful lace style with some leaves throughout the design. The moment I saw it, I knew I needed to make a Tinkerbell cosplay. So I bought it and then purchased some satin fabric to go behind it since it was see-through. I sat on it for a couple of weeks trying to decide how I wanted to go about and make it. One weekend I decided I was going to just take the leap and attempt it.

I started out by using sewist.com to design the pattern. If you would like a full review on the website you can check out my other blog post here. I did take some creative licenses with the design. First I started off by adding some spaghetti straps. I didn’t want to add boning to the bodice and I wanted to make sure that it would be able to stay up. Secondly, I made the length of the dress longer. I wasn’t comfortable with the length of the original design so I made it knee-length in the hope that I would also be able to wear it for other occasions as well.

Once I had the pattern designed I purchased it, printed it out, and cut out the pieces. I was really excited about it and I started with the skirt pieces and cut the green lining. I wanted to make sure that they would fit before cutting out the tablecloth. Once I finished that I started cutting the pieces out of the tablecloth and sewed them together and serging the edges to get them neat and clean. Then I started working on the top. This was slightly more difficult but I found it easier to baste the lace pieces to the satin so that I can keep a nice crisp seam. I ironed after every step to make that a bit easier. For a closure on the back, I added a zipper for convenience. When it was all done I did the bottom hem. When I created the original design I used a straight hem on the bottom. This gave me the flexibility to decide how I wanted the bottom. I folded it in fourths and used a 3.5 in measurement to make the edges. A little photoshoot in my office and some photo pixie dust and voila, I present some of my favorite images. If you have any questions let me know down below!

sewing

Crafting and Your Mental Health

Hello everyone! I hope that you have had a great month of May. Since this month is Mental Health month, I thought that I would take a moment and just talk about my Mental health journey and how sewing and other crafts have saved my life.

In 2014, I was at a big convention and had my first panic attack. Actually, I had several over that weekend. When I returned home from the event I went to the doctor because I was also experiencing vertigo and it was so bad that I could barely stand half the time. I was then diagnosed with anxiety and put on medication for it. I was doing better until I started to experience another mental health issue that likes to come with anxiety, namely depression. I have struggled with both for some 8 years. When I would have lows with my depression they were deep lows but society told me, I wasn’t allowed to show that I was struggling. Or at least that’s what my brain was telling was telling me. That there was something wrong with me and I needed to hide it from everyone else at all costs. The only problem is that after a while it starts to take its toll and I was only ending up more and more frustrated and turned into bouts of anger. I was feeling more like a mess than every before and everything I was trying wasn’t working. Worst of all, I was embarrassed to talk about it as growing up people just didnt talk about that kind of stuff.

Ever since I was a kid though, I loved crafting and making things but I hadn’t really found that one hobby/craft that spoke to me. When the pandemic hit, like happened with many, my mental health took a serious hit. I was used to keeping myself so busy that I didn’t have time to think and suddenly I was stuck inside and couldn’t go anywhere. For as long as could remember though I wanted to learn how to make clothing. I had a sewing machine already since in the past I had an obsession with making quilts. So I started with masks because they were small and I could make them quickly. With that, my confidence grew and I then made a tote bag for groceries that had pockets and lining. Then a headband. After these successes, I wanted to try making a pair of shorts. I found this fabulous video on YouTube about drafting your own pattern. My first attempt…well, I think it speaks for itself…

I’m not going to lie, all of my hopes were dashed in that moment. But fortunately, I’m stubborn so I recut the pieces out and watched the video again and again until I got it. That was almost 2 years ago and I’m still going strong. I have been able to create and design some breathtaking things because I never gave up. Along the way, it has really helped my mental health.

It has given me a creative outlet when things are not going the way I had hoped. It gives me a way to express myself and show up as my authentic self. Not only that but I have also discovered a wonderful and supportive community. So I encourage you, no matter what kind of creative craft works for you, keep searching until you find that one that speaks to you and makes you happy. The road isn’t always going to be smooth but it is worth it in the end.

To finish it off, I’m going to add a glimpse of my newest creation. It’s still a work in progress but I’m so proud or how much I got done this weekend. Can you guess which character this is a cosplay for? Talk to you next week!

sewing

May Craft Show

Hello! The warm weather is finally and you know what that means, it’s craft show time! I have a couple of craft shows that I am going to be doing throughout the summer. I figured I would share a little recap of what I brought in the hopes that it will give you some ideas in case you want to do some craft shows. I had quite a bit of inventory from last year since I made a ton and so I brought back some of the items that I have lefts.

For this show, it was inside and I had an 8-foot table for my display. This was the first time that I had ever done an inside event before and I wasn’t sure what to expect. So I got there and set up my table. I have to say I’m pretty proud of how it was set up, you can see how it looked below.

I’m not going to lie in terms of sales I was rather disappointed by this Fix. That said I was in a really small country town and there wasn’t really that much advertising and was just a small sign out front of the community center. That said, though, it showed me that I can transport, set up, and run a booth by myself. I was able to beta-test an idea that did work out well. Most importantly, it was a good beginner show for the season. It’s been 9 months since my last show and I was so nervous. Really what I lacked in traffic in the venue and sales, I learned that I needed to remember that there were a lot of positive things too. I’ll make a separate blog about that later but for now, I want to break down my setup to maybe give you some ideas if you are doing a craft fair this year.

Since I only had a limited space, I decided to only use one of my peg that I made last year and combine my lanyards and wristlet. These have a swivel clip that makes it great for keys or even ID cards/badges. I love these because it adds some height to elevate the look.

For the middle section, this was wear I put a variety of different items. I have some lower priced items in the front and then have some of my higher and middle priced items in the back. I have learned how important it is to have some higher priced items as it shows your items have good quality even if the larger ticket items don’t sell.

As you can see now, on the other side I’m adding more height with a tiered display for my scrunchies. I also like to add some bags for convenience for those who are planning on buying a lot. One of things I added new this year was grab bags. I’m not going to lie, I’m a sucker for a good grab bag. I had two different kinds one that was $5 and the other was $10 and this was actually my best-selling item. Needless to say I’m going to continue to make those this year. The bags came as a 3 pack from Dollar Tree, and I loved the pink color went well with my brand.

I hope this gave you some ideas. If you have any other suggestions on how you set up your craft show display, be sure to let me know in the comments. Have a great week!

sewing

Reuseable Paper Towels – Eco-friendly Project

Hello! Are you looking for ways to be more eco-friendly? Over the last couple of years I have started taking small steps into adjusting my day-to-day routine routine make it better for the earth. When I started this journey I was scared at first because I thought it was going to be really expensive, but it actually saves you money too. I started out with my laundry detergent by using Earth Breeze. In case you aren’t familiar, they are a company that sends you dehydrated laundry detergent. They completely dissolve in water and the package is biodegradable in just 3 months. 1 package lasts me a couple of months, and it’s only $12 for a package. After I got used to that I started using dissolving hand soap tablets. All of the packaging is biodegradable and I use the same glass soap dispenser that I’ve had for years. I’ve also switched my cleaning products to dissolving tablet cleaners as well and repurposed old clothing or fabric to make new pieces.

There is something that has always bothered me, though, and that is how many paper towels I use, especially when cleaning or cooking. It is a very embarrassing amount because I can’t stand to have certain textures on my hand. I’ve tried hand towels and cheap multi-use cleaning cloths but there was always something I didn’t like about them. This brings us to our post for today. I saw on Joann Fabric’s Instagram this year for earth day a guide for reusable “paper” towels. I knew right then that I had to make it. If you would like to find the instructions on Joann Fabric’s website click here.


Fortunately, the fabrics were also on sale so it made it much easier and cheaper. I also have never used snaps before so I was kind of nervous but they were easy to use and I bought a set from Amazon. Since you can find the information on their website I’m not going to repeat it on here. The instructions are very simple. You can also use a serger to make it even easier. I put my snaps 1″ on each side of the corner.

Would I make these again? Absolutely! I absolutely love them! While I will still use paper towels for raw meat and cleaning disgusting places (toilet I’m looking at you) I will make more for everything else. They turned out so beautifully. I want to make ones just for cleaning and summer just for drying my face after I wash it. If you would like to see a video as I work on it please head over to my YouTube channel! Is this a project that you would be willing to try? Let me know in the comments!

gift ideas

Bible Gift Box Idea Stuffers

Hello! Thanks for stopping by today. Last year, I posted a video on my YouTube channel on how to make a New World Translation Bible gift box. Lately, I have been receiving a lot of comments asking for some ideas on what to put in these gift boxes. While I have posted a video in the past of what I included the first time, I wanted to include some more ideas of what you can include. I was invited back to pioneer school this year and I thought this was a great opportunity to reevaluate and add some more ideas. For reference, you can find the DIY gift box here.

Here is a video of what I added last time: https://youtu.be/GxuvBfMS1PQ

A quick run-down of the previous ideas:
~ Handmade Bookmark – great for the Bible or study publications
~ Pen – great for territory or letter writing
~ Pioneer Power Bar – great for a sweet treat to enjoy
~ Honey Jars w/ How Sweet It Is To Serve Jehovah With You tags

I have included 7 more items that would be great for putting in the gift boxes. For a video with pictures of these items, check out my new video HERE. Each one will have a link to an Etsy listing that you can get inspiration from or buy from these sellers or others. This is not sponsored by any of these sellers. These were just ideas that I thought were cute. If you have even more ideas then please be sure to comment below here or on my youtube channel.

1.) Best Life Ever Boarding Passes – I thought that these were really cute. The Etsy listing is for a digital file that you print on your own. Though they are more decorative, these can be used to encourage them when they are having a tough time or are facing discouragement.

2.) JW Sticky Note Pads – These are great for the ministry. It’s great for when you are not able to find a return visit home but you want to let them know that you’re thinking of them or if they weren’t home for the appointment. They will stick easily to the door or literature if you leave some.

3.) Contact Card Case – These are so great for the ministry or for cart work. It keeps the contact cards safe without them getting bent or ruined in a pocket or a bag. There are different styles to choose from so you can mix it up as needed.

4.) JW.ORG Pins – These are cute for wearing on a jacket or a suit coat. There are so many designs that you can choose from. Personally, I love sea turtles so this was one that I liked best.

5.) Keep Shining Good Jar – You know I had to include another goodie idea. I thought these were super cute and you can buy them 8 or 16 at a time. I think the whole idea of them looking like lightbulbs is genius and gives me nostalgia for the old pioneer books.

6.) Personalized Coasters – These are great for when they are at home and letter writing or telephone witnessing. Depending on what you are making them for, you can do just a single coaster or a set for their house. You can get ones that are already made or make them for yourself. You can also buy coasters at dollar tree and use a Cricut or Silhouette to cut out something with permanent vinyl as a fun DIY.

7.) JW Bible Earrings – For the last one this is for sisters that you know really well. These are super cute and are great for couples as it comes with an earring set and with a matching lapel. They are small and because they are made of polymer clay I would guess it was lightweight. This is the prices option on the list but looks really adorable.

BONUS: Eyeglass Cleaning Cloth: This one doesn’t have a link because there are many different options and so it’s all up to personal taste. These are great for those that wear glasses but also for sunglasses in the summer.

Thanks again for joining me today! Next week we will talk about some eco-friendly “unpaper towels”.

cosplay

A Cosplay Fit For a Queen: Padme Amidala Picnic Dress

Happy Star Wars Day! May the 4th be with you! I’m so excited to be back with another post for Star Wars Day. This is a dress that I have dreamed about owning since Star Wars: Attack of the Clones came out. Let’s be honest, all of Padme’s dresses are amazing but this one has always had a special place in my heart. I honestly thought that I would never own this dress. Then one night at 3 am it suddenly occurred to me, I know how to sew now! I can make the dress! Needless to say, the hyper fixation began that night. I ran into a lot of issues along the way but was able to tackle them one at a time. I started out with the McCall’s 3797 Renaissance Costume Dress Pattern. This pattern gave me the sleeves and everything that I needed. Unfortunately, I was not able to find any fabric that had the embroidery that I needed on it already. So after I cut out the pieces I had to embroider the entire thing by hand. It took close to 150 hours for just the chiffon part. Though it was a lot more work it was definitely worth it. Here is what it looked like when everything was put together and embroidered.

Of course, the sleeves are actually off the shoulder but I was not able to get it to stay up my mannequin that way. I added an invisible zipper to the back to make it easier to get on. For the sleeves, I added rose buttons to keep them closed and match the shawl.

For the shawl, I used a curtain that already had rose embroidery. It was in a white color though and I needed it to be yellow. So I used some of the Rit Dye for synthetics. In the end, I only died it for about 3-5 minutes and it turned out beautifully. I embroidered the scallop edging using my sewing machine to finish it off.


The biggest problem that I found was that I couldn’t find a corset that I liked and would work with the costume. I had never made one before so though I didn’t know what I was doing I decided to try to draft one myself. So I did what all of the best youtube videos said, wrapped myself in duct tape! You can enjoy my rather embarrassing photo below. I drew out on the tape where I wanted everything to be and then cut out the pieces and traced them to paper. The hardest part was the embroidery. I was able to get a custom order from an etsy shop with the hand embroidery guide. I use a water-soluble stabilizer that I had left over and used a Sharpie marker to trace it on. Then got to work. For the roses, I cut out the ones on the left over fabric from the shawl and glued them on. I added the grommets and was done after adding the boning to the lining.

Then I finished the look by crocheting the bun covers out of gold crochet thread. I made a butterfly pin using polymer clay and used some filler diamonds from Dollar Tree for the jewels. To finish off the look, I bought a brown curly wig from amazon and gold shoes. Hers was a square toe and I was able to find a comfortable pair for a good price.

To finish off this post, I’m going to share with you some of the finished pictures. Be sure to let me know what you think in the comments and if you have any questions about the process, please be sure to let me know. May the Force Be With You!

sewing

Is Sewist.com worth it? Is it legit?

Hello! Have you wanted to make a dress or outfit that is completely unique but has little to no pattern drafting experience? Is there a specific design that keeps you up at night but you just don’t know how how to make it a reality? In comes a website called sewist.com. The idea of this website intrigued me as I always have big dreams of dresses and things that I want to make but I’ve been sewing clothing for less than 2 years and still have so much to learn. What I liked about this website is that you have total and complete control of everything about the item. I’m going to use dresses as an example. You can pick if you want it fitted, the sleeves, the neckline, darts, skirt, do you want ruffles, the length of the skirt, waistline, and more. It uses AI to create a pattern based on the items that you select. Then you can purchase the pattern from them and it supposedly comes with instructions. Just to put this out there, this post is not sponsered in any way by the site. This is my personal opinion and experience with it. My goal is to make others aware of the pros and cons of this tool. So let’s talk about this.

Interface

It has a very nice beginner and user-friendly interface. It is simple so you don’t get overwelmed and confused by unuseful graphics and it’s easy to just click on the things that you like.

Options

For the basic items to start with they have a good variety of options. At this time for Women’s clothing they have Dress, Top, Skirt, Pants, Jumpsuit, and Lingerie. For Girl’s Sizes they currently just have Dresses and Skirts but Tops are coming soon. That said if you are looking for men’s patterns they do no carry those. Once you actually started selecting what you want after picking the main type of item the options are actually very impressive. I was surprised by the amount of neckline and sleeve options. Some of them I had never seen before. Each option has a drawing to give you an idea of what you are looking at.

Personalization

Once you get to the part where you have selected all of your options it gives you a preview of what you dress looks like. But you can actually personalzie the preview even more by adding the colors that you are going to use or selected a pattern from their preinstalled library. This helps you visualize it even more. You can also decide if you want to add seam allowance or not.

Sizing

This one kind of goes right along with personalization. One of the things that I love about this website is that it is size inclusive. I am a mid-size queen. In normal sizes I wear around a 14ish but could go one smaller or bigger depending on the design. I find it incredibly hard to find sewing patterns my size as everyone wants to make them for the thin girls or if I’m lucky they list me as a 4XL. Every body is beautiful and I’m not ashamed of my curves. However I do get frustrated easily with this lack of inclusivity. This website is different though. It goes from 4XS all the way up to 9XL. This means that no matter what size you are, you can design somethign that makes you feel confident and to me that is the most beautiful thing in the world. You can also have the sizing personalized even further by entering your measurments and then the AI will make the pattern to fit your specific body. If you do this option, keep in mind that if you sizing goes between two sizes they will pick the bigger size. You can also use the size chart to determine your size. For the users in the United States be sure that you click the inches buttons on the side panel otherwise the size chart will be in centimeters. You can also include multiple sizing optiongs if you are making the same dress for several different people or if you want to sell the pattern.

Pattern Instructions

I found the instructions complete with basic information on how to put it together. It does have a picture of your finished design in the instruction files and but when it comes to necklines it just has basic facing pictures and things however it is written in a way that is easy to follower. I also love that it’s not just limited to english speakers. You can download the instructiongs in English, German, French, Spanish, Italian, and Russian.

Price

Last but not least, we are going to talk about price. To me this is probably one of the most important things. Patterns can be very expensive especially if they are bought from the store. I don’t know about you but I’m all about trying to save money. Can you guess how much it costs for the pattern. $3. Yes you saw that correctly. Only 3 US Dollars. You can also download a Preview for FREE so you can make sure that it’s set up in a way that you want. There is another site called Tailor Nova that offers a similar program but it is I believe $13 for the pattern at each size. However I was incredibly impressed by everything that it offers. That said if you want an additional sizing of the pattern it is $3. So if you were putting it up to sell and you wanted 10 different sizes for example, it would be about $30 ($3 x 10 patterns). To me that is still a fantastic deal.

Things I Don’t Like

I want to give you a fully transparent review and there are a couple of things that I really wish were different. For example, when selecting your pieces you have to remember and visualize what you already selected as there isn’t a Preview that updates on the side as you select things. That is one of the things that Tailor Nova has and I found incredibly helpful. Another thing that I don’t like is that you can’t upload your own picture to use in the finished preview. You are limited to the short supply that they already have in the system.

Final Word

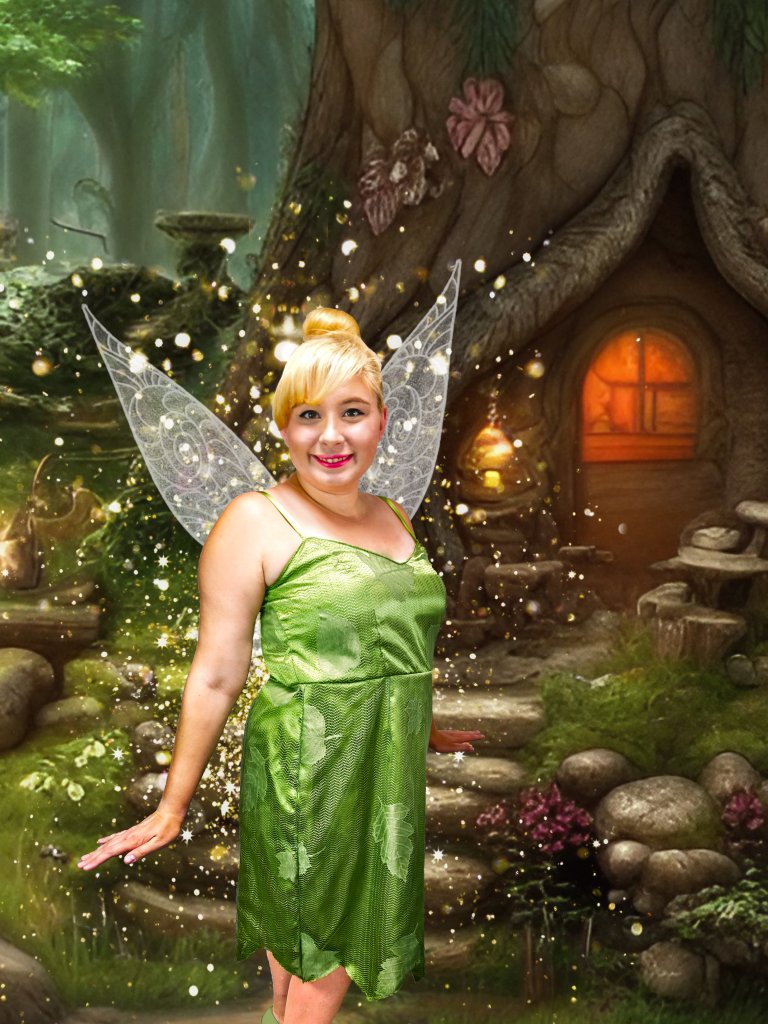
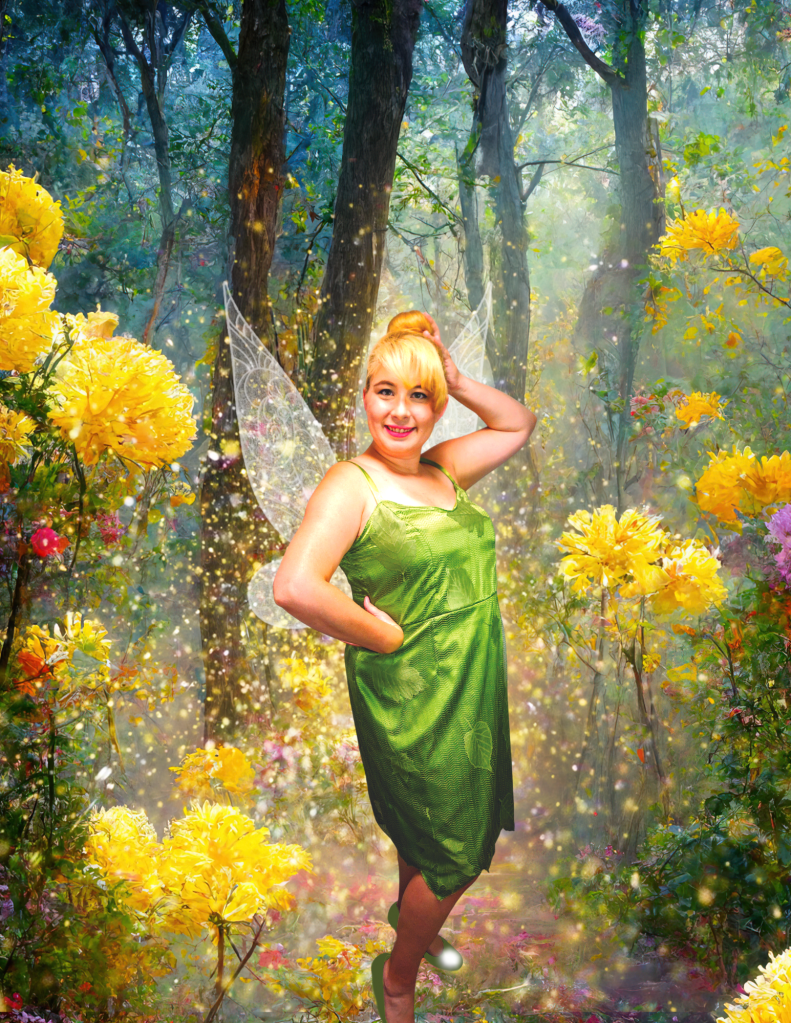
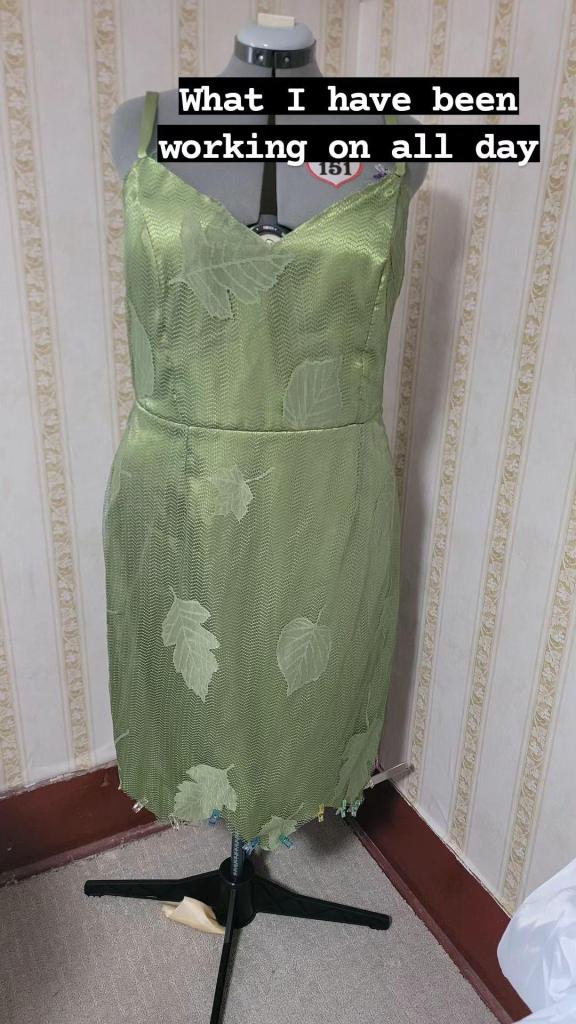
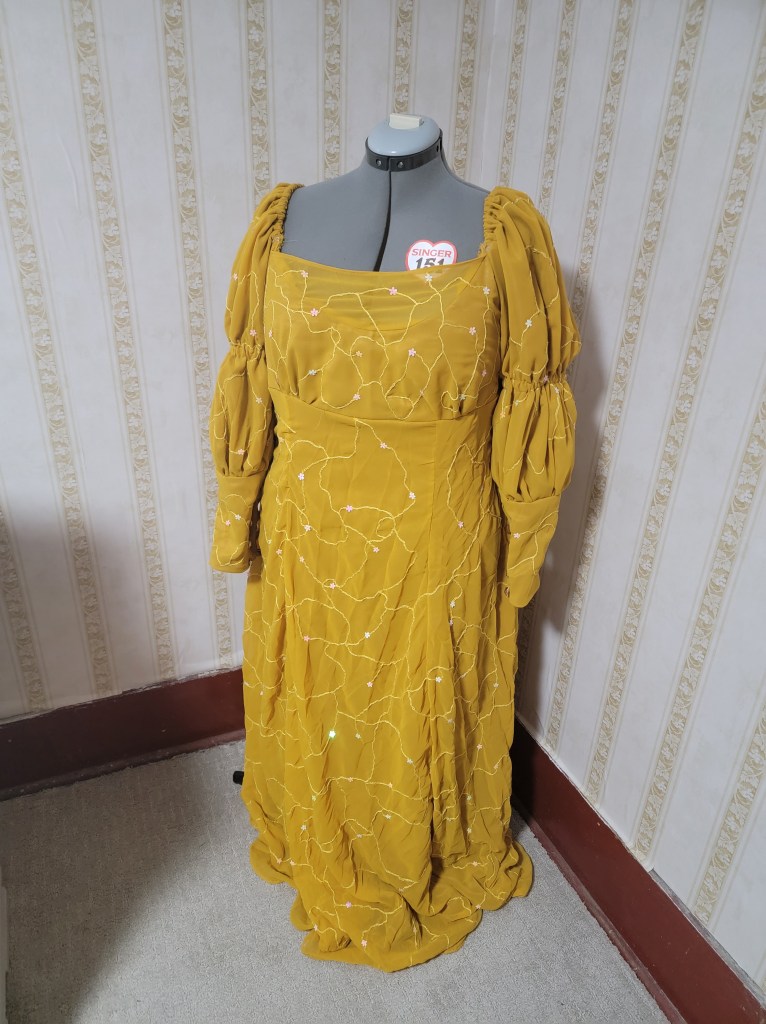
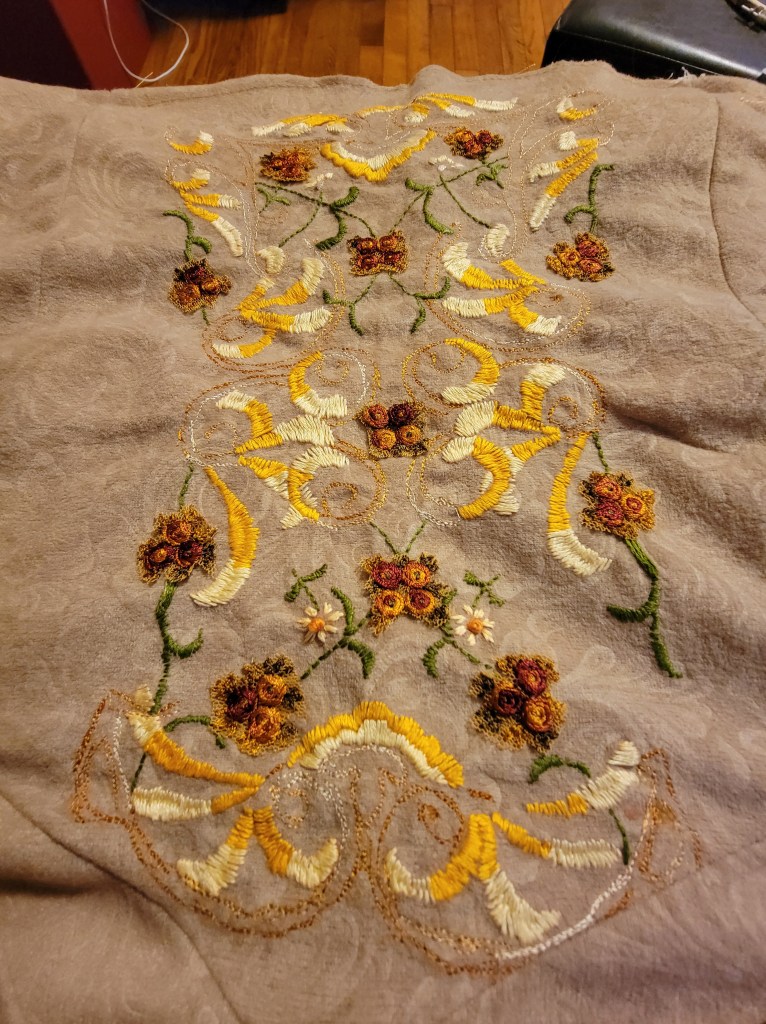
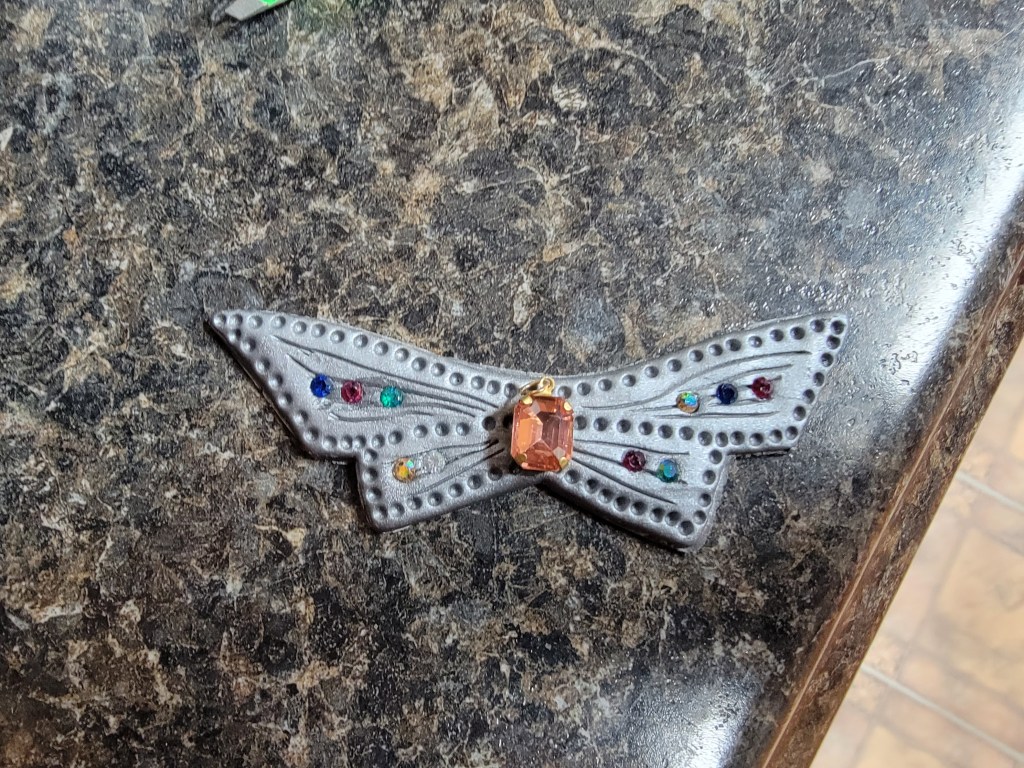
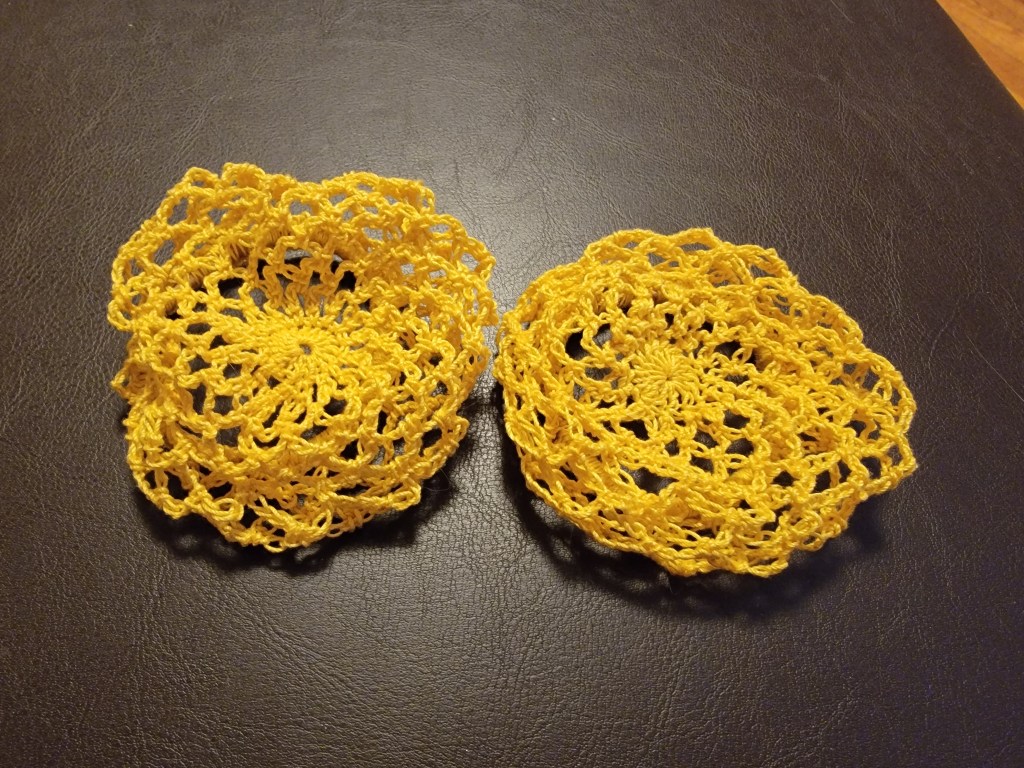
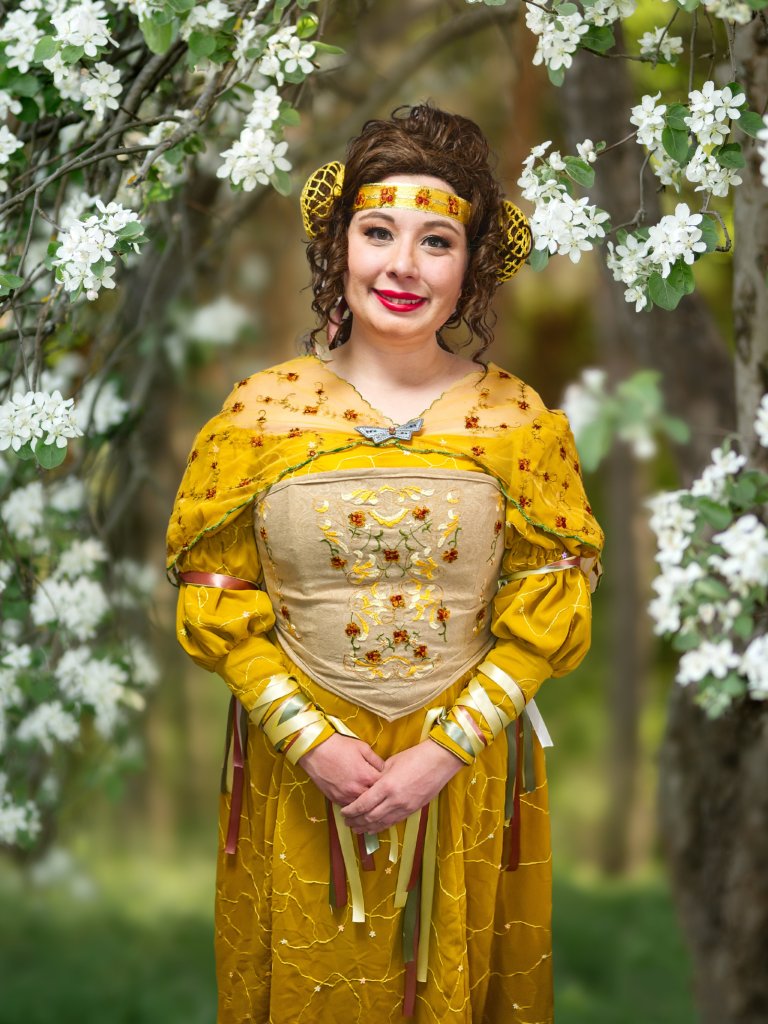
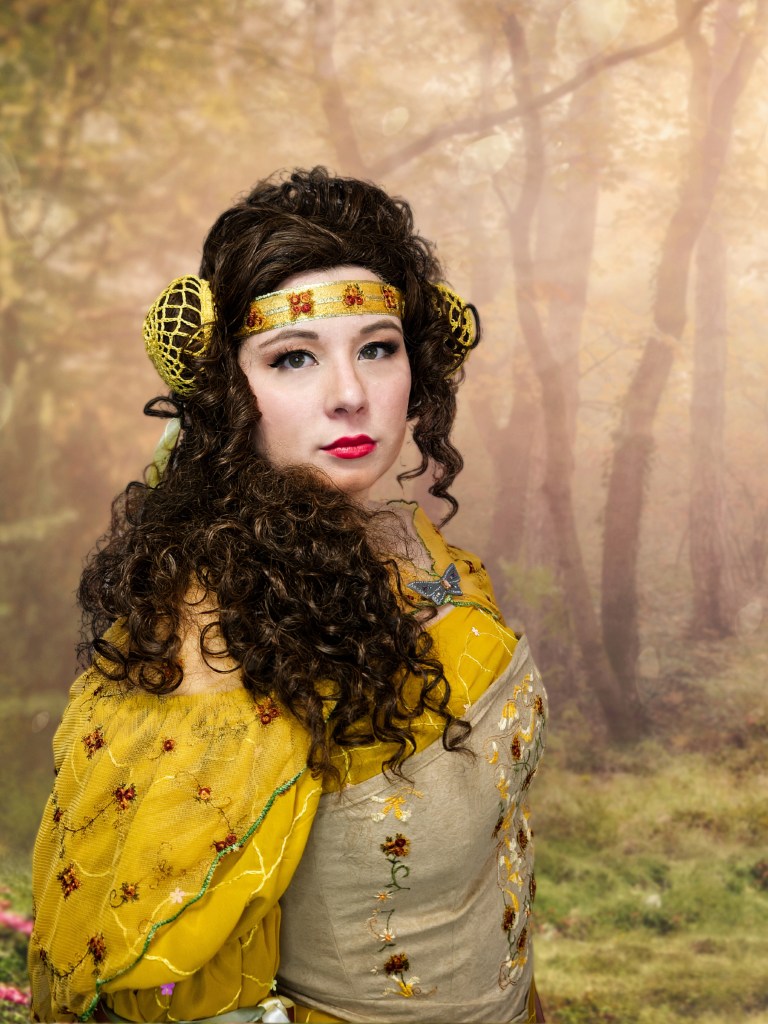
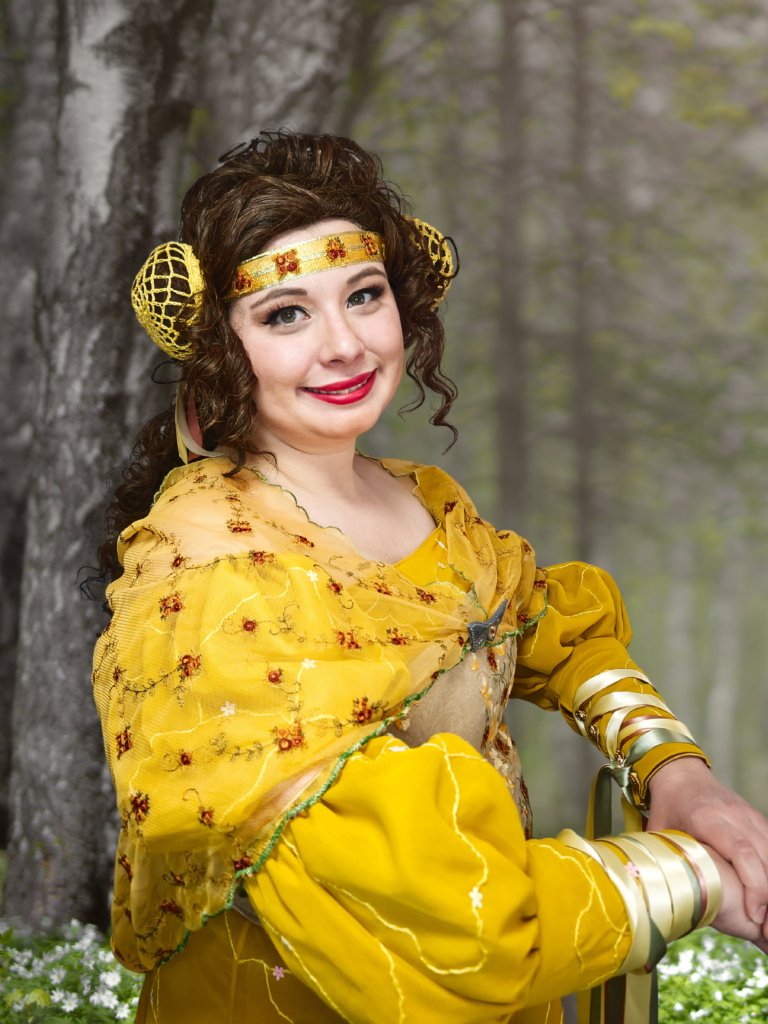
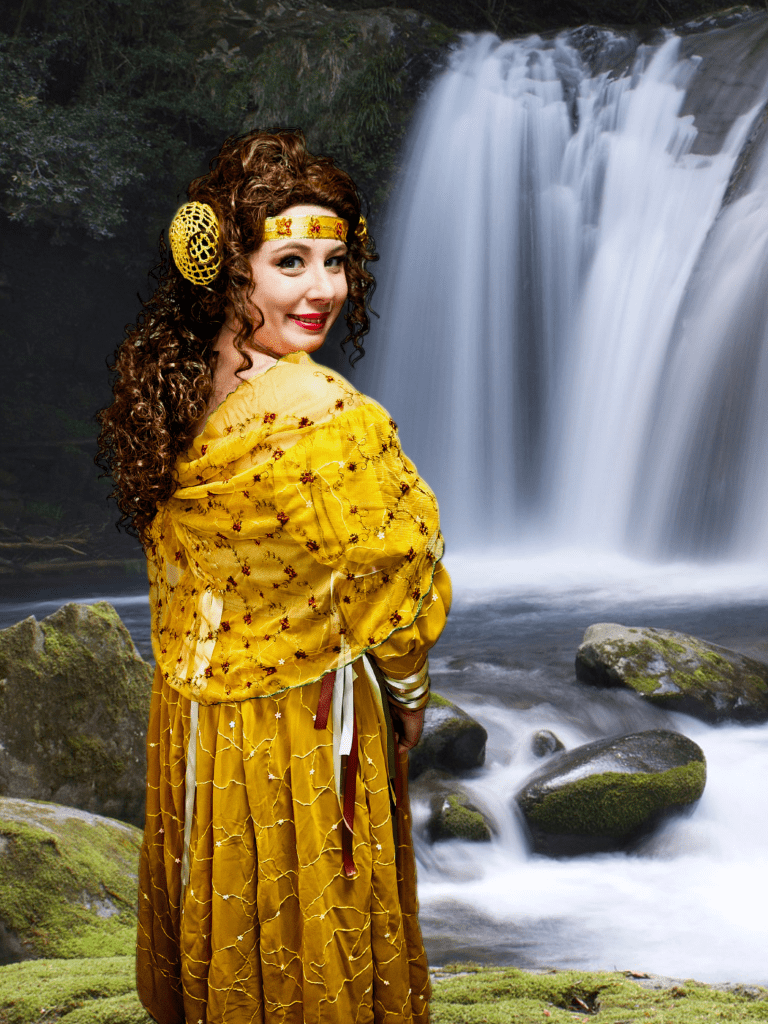
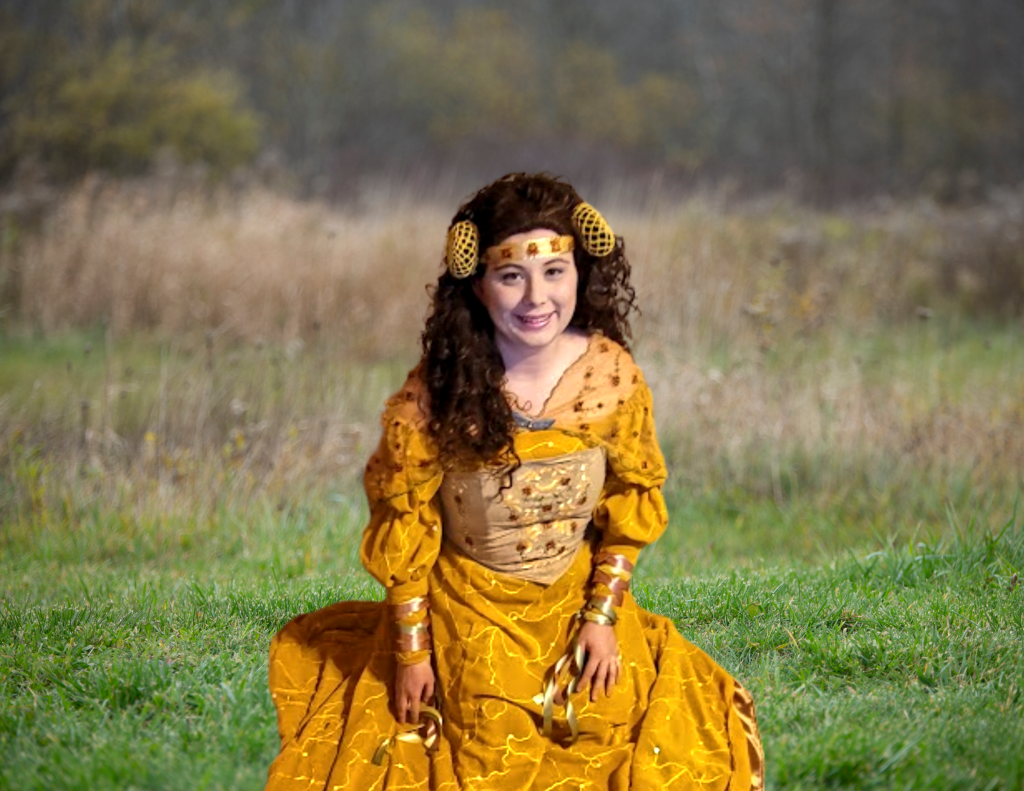
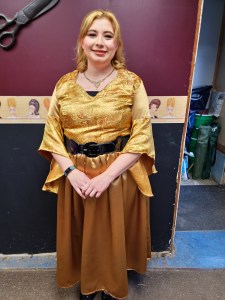
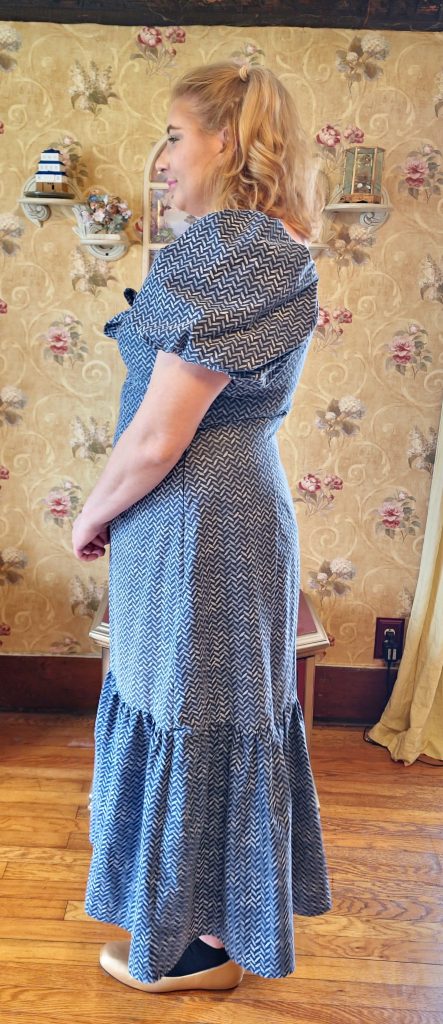
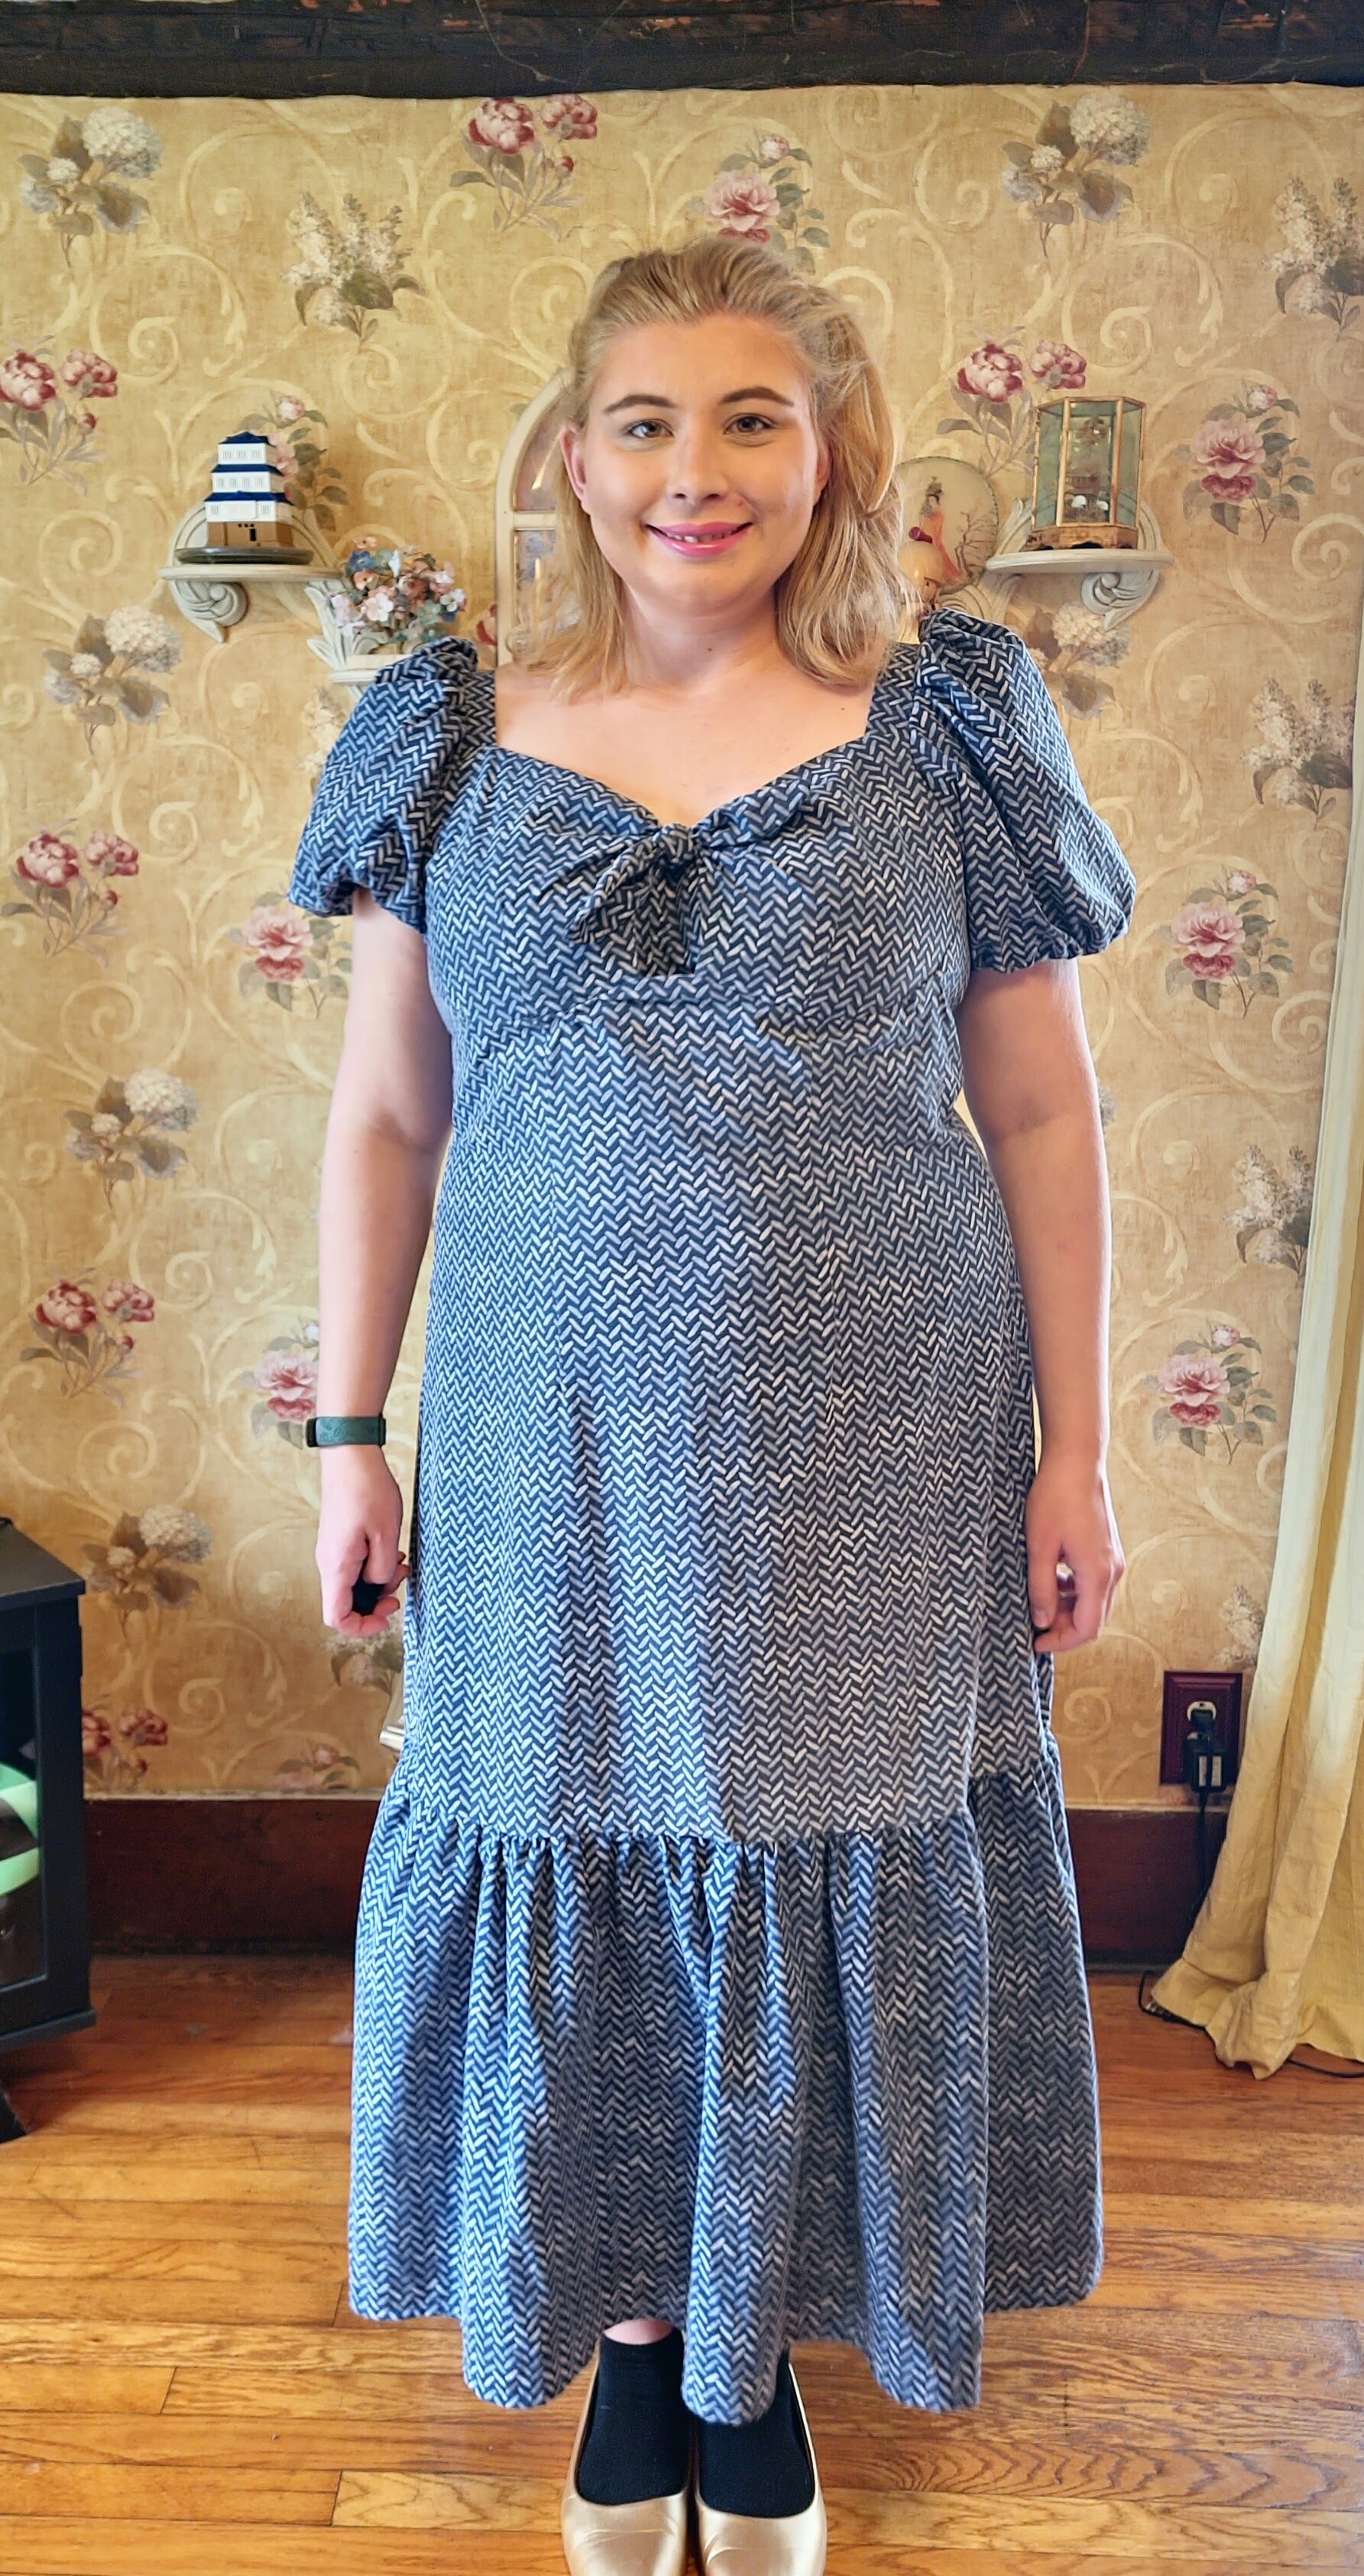
Would I use it again? Absolutely! I loved using the designer. I input my measurements and height and it came out perfectly. I like how size inclusive it is. The different options that you can add to the design and that they keep adding even more options. This is definitly not a scam. When I first saw this the old say came to my mind “If it sounds too good to be true, then it probably is.” So I was worried but for $3 dollars I was willing to try it and I was not disappointed. I can’t wait to design more items in the future and browse the collection that others have made as well. If you are interested in designing your own patterns, give this a try. Did you know about this tool? Have you used this or Tailor Nova? Let me know in the comments. To finish off, I’m going to post a picture of the dress that I made using this tool. Let me know what you think.

sewing

Pattern Review: Confetti Frock by Lydia Naomi

Hello! I hope that everyone has had a great week! I am so excited to share with you a pattern review of the newly released Confetti Frock by Lydia Naomi. This was released in the middle of the week and I’m so excited that I was able to pattern-test it before the release. Let me tell you. This is the cutest and most comfortable dress that I probably own right now. Don’t take my word for it take a look at these pictures.

Just look how cute that is! There is a couple of details that I really love about this pattern. First of course the sleeves. Lately, I have been into big voluminous sleeves and these are no exception. They are gathered at the top and have a hidden elastic in the bottom to make them super full. Second, I love the length. The ruffle at the bottom is optional but since I’m 5’8″ I need to have long dresses and with the ruffle, it made a nice tea length for me. Something that I was not expecting to like was the zipper. If you look at the image on the left you can see the seam where the invisible zipper resides. I am wholeheartedly a back-zipper kind of person. The zipper of this dress not only goes on the side and into the sleeve but it is still perfectly comfortable.

Some of the things that I love about this particular pattern is how complete the tutorial is. Not only are there pictures and written instructions on every step but there is also a video for each style. One of the styles is as pictured above and the other style has spaghetti straps. In order to be successful you MUST read the Read First file completely before doing anything else. This tells you how much fabric you’ll need, the measurements of the finished garments, sizes, and notion lengths such as the elastic, twill tape, zipper, etc. Some other important information that is tucked into that file is how to do a full bust adjustment. The pattern is for a b/c cup but the adjustment shows you how to make it bigger or smaller as well as how to make it longer and shorter. This is absolutely essential. Please do not skip this step.

Another essential step is when you print out your pattern make sure to use Adobe Acrobat so that you can print out only the size that you need via the layers tab. There are darts and such in this pattern so it gets confusing with all of the sizes if you do not do this. There are quite a few pages, I can’t remember exactly but I want to say around 32 so just be prepared for that.

The dress itself has a very snug fit and is made with a woven fabric with no stretch. With that in mind, I actually went a size up as my weight loves to fluctuate and I wanted to make sure that I would always be able to wear it even if I was a couple pounds heavier. (Just for reference my normal dress size is 14/16. According to the chart, I was a size 20 and sized up to a 22 so be sure to check out the sizing chart.) Because I sized up, I didn’t do the bust adjustment but that might be something I try next time. In the photos above I actually sewed an extra piece of fabric where the cups tie together to keep it more modest. However with the official release she added in the Read First file how to make an adjustment to close the gap which I am incredibly thankful for.

All in all, I really recommend this pattern as it is cute and perfect for spring/summer. It’s very comfortable as well and allows you to be unique. I actually upcycled fabric from old bedsheets to make this dress so get creative with it! If you are interested in trying it out you can buy the pattern from her website: https://www.lydianaomi.com/ or her Etsy store https://www.etsy.com/shop/LYDIANAOMI. Also if you are interested in seeing her tutorials on how to make Style A and Style B check out her YouTube channel at: https://www.youtube.com/@LydiaNaomi. What I love about her YouTube channel is not only does she have video tutorials for her products but she also shows how you can alter clothes that are currently in your closet to fit you and gives great tips for sewing. So show some love to this amazing artist and support her small business. If you do try it, let me know what you think in the comments, or if there is another pattern you would like me to try, link it below! I hope you all have an amazing rest of your week!

cosplay

Learn Well! The Master Roshi Style is With You!

Hello, my friends! I’m so excited to be back with you to share another Cosplay adventure. So we went to our local comic con not too long ago and my husband wanted to go as Master Roshi. This is only the second costume that I have made for him so I was a bit concerned in addition to trying to get my own costume done to enter the competition. However, I absolutely love how this turned out. If you are interested in learning a bit more about how I did this then please keep reading. Since my costume was taking must longer than expected, don’t worry I’ll make a post about that one later, we needed to pick a costume that we knew for sure we could have time for. Though my husband loves to dream big, as I do, we had to be realistic and this seemed like the perfect option. He already had the shorts and flip-flops as part of his regular wardrobe so the only real thing for me to make was the shell and shirt. The accessories like the staff and facial hair we were able to buy from Amazon, fortunately.

The Shirt

I started with the shirt because I had never made a men’s button-up shirt before and it was kind of intimidating especially with the collar. I was able to find a sewing pattern on Etsy, you can find it here. The price was great and my husband wears button-ups several times a week so I thought this would be great to make summer shirts that he can wear any time. We were on a tight budget so after looking at several different fabric options, I opted for an orange 100% cotton fabric from our local Walmart. I spent and afternoon and evening making the shirt only then to realize it was too small. I was completely defeated because I then had to reprint the pattern, tape all of the pieces together once again, cut the pattern pieces out, and then cut the fabric. I will admit, I did procrastinate a little bit because of my ADHD because it was completely overwhelming to me. Thank goodness for talking to my amazing cousin on the phone as it helped me get it done. So after I went and bought more fabric from Walmart I started again. Since Master Roshi’s shirt is supposed to be loose anyway I decided to just go with the biggest size thinking that if needed I could just take it in later. As it ended up I didn’t have to do that and it worked perfectly. When the shirt was done it looked something like this:

I then used my Cricut to cut out some purple triangles and black letters. I was really fortunate with how Design Space put the triangles as I was able to use not only the ones that I added but also the “negative space” triangles so I didn’t have to cut more. As it ended up with the letters, I needed two cut 1 1/2 sets of the alphabet to cover the entire shirt. I bought some 5/8 white buttons from Hobby Lobby and used the setting on my machine to do the buttonhole.

The Shell

I’m not going to lie, the shell caused me severe anxiety. I had never made anything this big with foam and I was so scared that I was going to ruin it. I only had a month so if something went sideways I did not have a chance to Fix it. I started out trying to find a pattern. I searched the internet trying to find something that I could use. Eventually, I found a EVA foam shell on Etsy for a Mario Cosplay, you can find it here. I bought it quickly and taped the pieces together then cut it out. I quickly realized that this was not going to work for my over 6′ husband as it’s made more for a child or teenager. I started to panic and messaged the seller and she told me how I could adjust the size. With my dad’s help and his handy dandy compass drawing tool, we added 4 inches all the way around and it worked perfectly. The cosplay foam was pretty expensive and since it isn’t Halloween they didn’t carry it at the majority of the craft stores in the area. So for this one, we actually opted for the foam floor mats from Harbor Freight. We used the Weldwood Contact Cement to glue the panels together and traced out altered pattern on the foam and cut it out. (I took inspiration from the video found here for the main construction and top details)This time I wanted to try one of those breakaway blade knives to cut the foam. When making my Ahsoka Tano cosplay I used an X-Acto knife and it was a pain to keep changing the blades. This stuff was much thicker as well and I like that I could adjust it to make the blade long enough to cut in one pass. I glued the darts shut and we had a shell! I bought a white foam dowel rod and cut it in half to use as trim.

After that, I covered it in painter’s tape. Lesson learned…..if you are doing something this big, use tape that is at least 2.5 inches wide otherwise you will use a whole bunch of tape and get little accomplished. I wanted my husband to be able to participate in this and so I had him draw the lines of how he wanted the raised parts of the shell. Afterward, I cut them and unstuck them from the shell and used the left over foam from the mats to make them. For the areas that were really curved, I made single cuts to great a dart so that they would lay flat on the foam. I then started to glue them to the shell. It took me a morning and afternoon to do all of this with plenty of breaks as I was also sanding the edges to get a rounded and more natural look and the smell of the glue got to me a couple of times. I let it completely cure then I hit it with the heat gun to seal the foam. Now it was time to seal it again. Admittedly what I used, I would never use again but I bought a can of flex seal rubber sealer for roofs and figured I would just paint it on. For the Ahsoka costume, I used a spray but it’s winter time and we kept getting snow or rain and I thought it would add texture. Well… it was a pair to work with and this stuff took 3 days to fully cure. It was also incredibly thick and liked to run, but hey that’s even more texture, right? When that was finally all done and cured it was time to paint. I used some of the Flexible FX paint in purple at Hobby Lobby. It just so happened to be on clearance for 86 cents so that was a major win. I mixed it with some black FX paint I had left over and painted it in between the raised parts of the shell and on the edges. After that dried, I took the straight purple and put blended it around the edges, and applied it to the middle. Then mixed the purple with some white to get a lighter shade and use a natural sponge to apply it to the very center or the parts that stuck out for highlights.

The last part I had to worry about was how we were going to make it wearable. This was difficult because I wanted something he could take off for panels easily and if he dropped something I wanted it to have enough give to stretch. As it ended up we were able to upcycle some old dress suspenders and hot glued them to the inside. This allowed the straps to even be adjustable and comfortable all day.

So that’s pretty much it for this costume. He loved it and got so many pictures with different people and those Dragon Ball Z cosplays and best of all it was comfortable and affordable. If you have any questions don’t be afraid to let me know! Thanks for joining me today!

Uncategorized

Cosplay In A Galaxy Far Far Away – Ahsoka Tano Cosplay

 Hello and thank you for joining me again for another cosplaying adventure. From the moment that the last Comic-Con was over, I knew the next one that I wanted to do. While I had originally planned to take it slow, I learned that once I get excited about something I can’t stop and even found another convention to attend exactly one month after the first one. Let me tell you this was a crazy month and I had a lot of moments of frustration and tears but I absolutely love how it turned out.

I started with the headpiece because I knew that was one of the most important parts of the whole costume. This was only the second cosplay I had ever made and NEVER have I used foam so this was going to be interesting. I was able to find this pattern on Etsy for the Lekku (Click Here to be taken to the pattern) I tried a variety of different adhesives on the 3mm in an attempt to find one that would actually work. In the end, I used Weldwood Rubber Cement. Something that I look is most important with this is to apply a THIN layer then you want to let it dry for a couple of minutes. It should not look wet. You can use a heat gun to bend the foam to get it to the shape that you need. A video tutorial on Youtube provided by the seller helps to show you how to put it together. Please note that it can only be printed on A4 paper so if you are in the US you’ll have to buy special paper.

After you finish putting it together, you need to seal it with your heat gun. This will close the particles and help to make sure it doesn’t melt or get deformed when painting. The foam will be shiny when it is properly sealed. Next, I highly recommend sealing it again, some recommend Plasti Dip though I used a spray rubber by Gorilla. Personally, I used the white color so that I could make sure that everything was covered and sealed properly. I let it cure for the full 24 hours before painting. For the paint, I used Plaid FX Flexible acrylic paint in a couple of different blue colors to add depth to the piece. 

For the armor, I purchased the pattern from the same seller HERE. It came with no instructions but was able to figure it out. Eventually. Please note that I am a size XL and the belt part I had to adjust because it was not long enough to go around. After everything was put together I sprayed it also with the spray rubbed and painted it. For the silver parts I was running out of time and opted to pair it with spray paint with a hammered metal texture. For everything except the belt, I added elastic straps. To keep it secured I sewed a piece of nylon webbing (or straping) and then hot glued it to the back of the piece. For the belt, I hot-glued the buckle to one of the sides and then put velcro to hold the other end of the buckle to the other end of the belt. However, I was worried it would randomly fall off so I bought some parachute clips from amazon and attached elastic to each one, and put it on the inside of the belt so that it would have doubt security but still stay hidden.

Last but not least is the dress. I purchased this pattern from Etsy HERE. Admittedly at first I was worried because there are no sewing instructions what’s so ever. However, it is a pretty easy sew. I started with the shoulder seams and then the side seams. I trimmed the extra from the seam allowance and clipped the curves in the side seams. Since I have a bigger chest, it didn’t fit quite right there so I added a couple of darts that fixed the problem. For the silver details, I traced the guides on my computer and had my Cricut cut everything out of silver HTV and then applied it with my Cricut Easy Press Mini.

I finished off the look with a $5 pair of navy blue leggings from Walmart and some tall boots that I used that I already had.

Dress fabric: Click Here
Silver HTV: Click Here
Navy Forearm Sleeves: Click Here

Now with the final reveal of the whole costume:

If you have any questions, please don’t hesitate to reach out. Until next time!