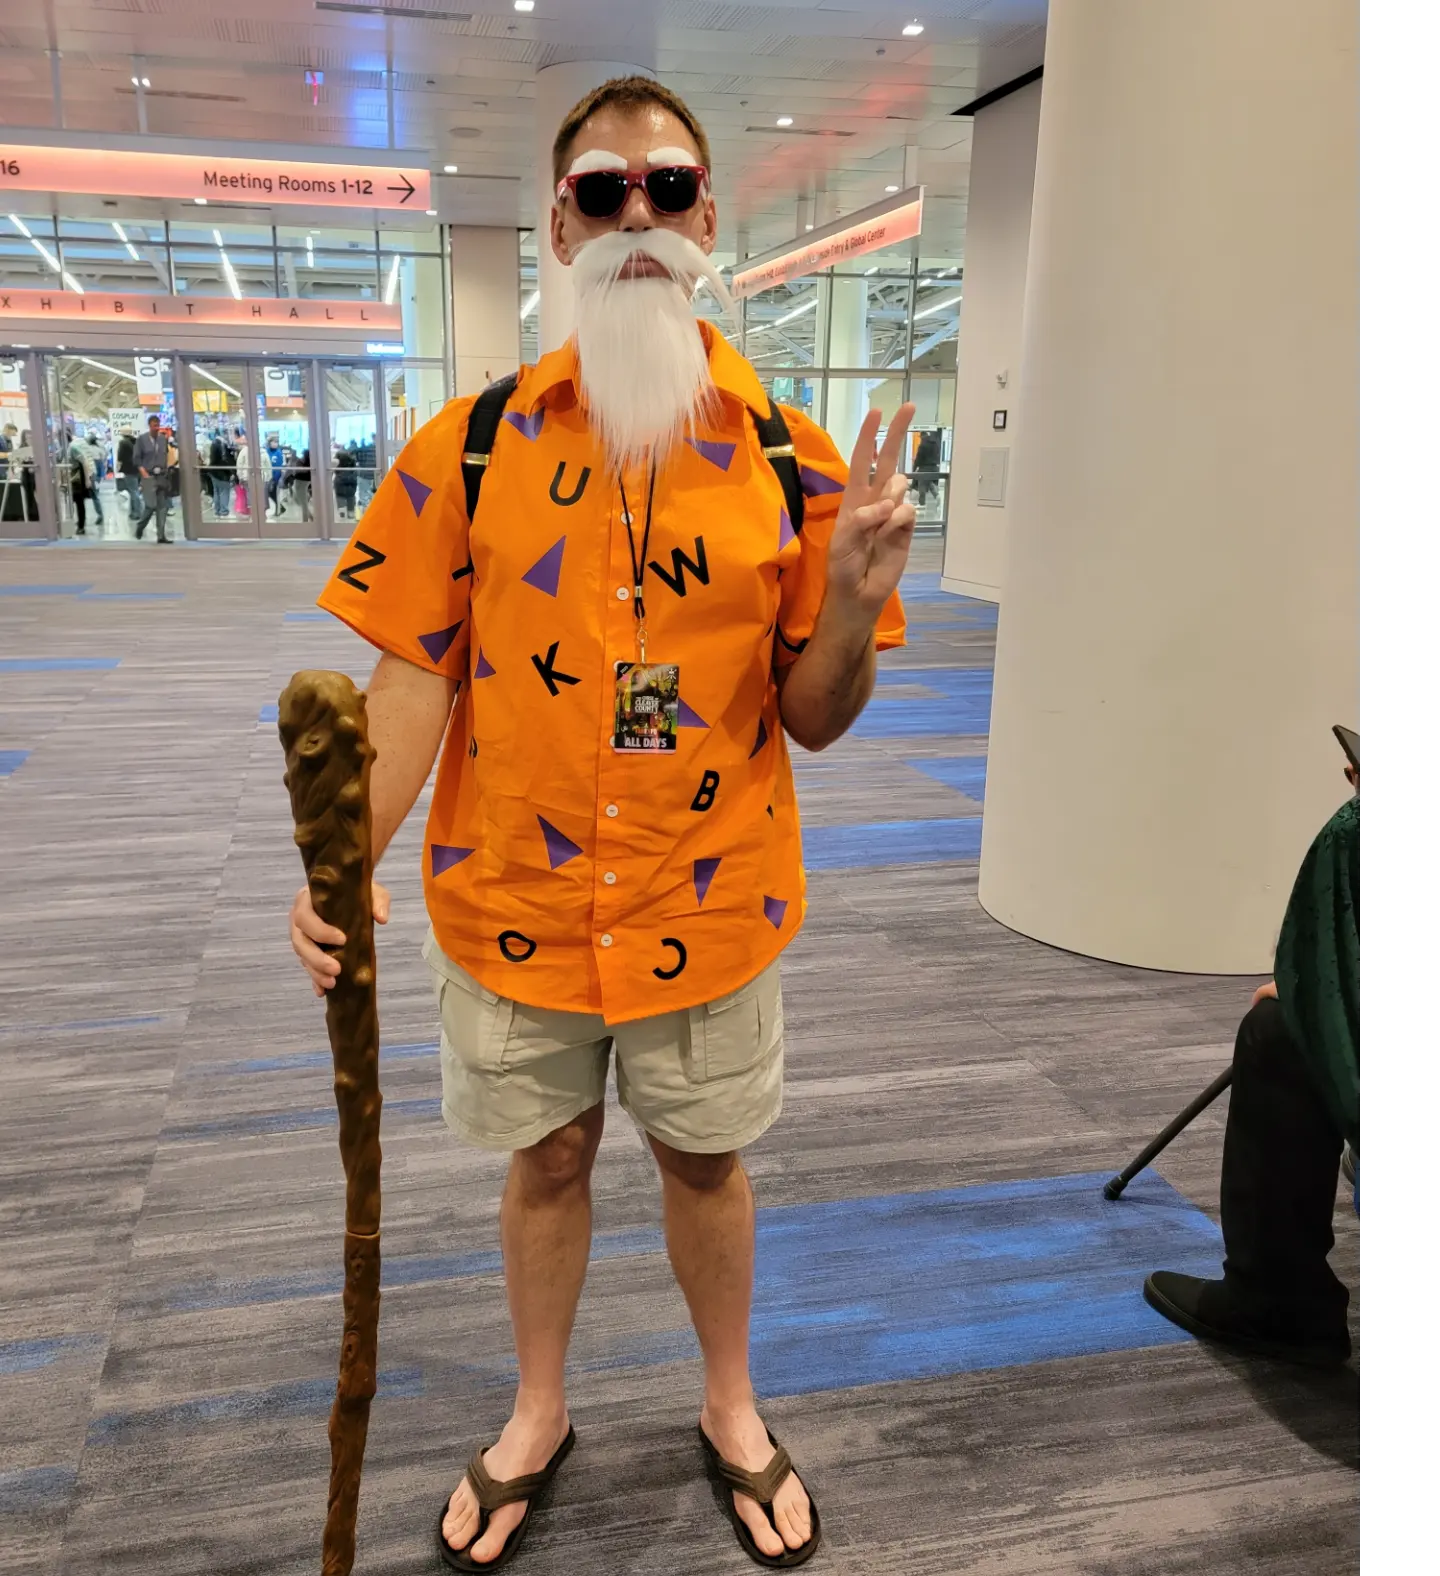

Hello, my friends! I’m so excited to be back with you to share another Cosplay adventure. So we went to our local comic con not too long ago and my husband wanted to go as Master Roshi. This is only the second costume that I have made for him so I was a bit concerned in addition to trying to get my own costume done to enter the competition. However, I absolutely love how this turned out. If you are interested in learning a bit more about how I did this then please keep reading. Since my costume was taking must longer than expected, don’t worry I’ll make a post about that one later, we needed to pick a costume that we knew for sure we could have time for. Though my husband loves to dream big, as I do, we had to be realistic and this seemed like the perfect option. He already had the shorts and flip-flops as part of his regular wardrobe so the only real thing for me to make was the shell and shirt. The accessories like the staff and facial hair we were able to buy from Amazon, fortunately.
The Shirt
I started with the shirt because I had never made a men’s button-up shirt before and it was kind of intimidating especially with the collar. I was able to find a sewing pattern on Etsy, you can find it here. The price was great and my husband wears button-ups several times a week so I thought this would be great to make summer shirts that he can wear any time. We were on a tight budget so after looking at several different fabric options, I opted for an orange 100% cotton fabric from our local Walmart. I spent and afternoon and evening making the shirt only then to realize it was too small. I was completely defeated because I then had to reprint the pattern, tape all of the pieces together once again, cut the pattern pieces out, and then cut the fabric. I will admit, I did procrastinate a little bit because of my ADHD because it was completely overwhelming to me. Thank goodness for talking to my amazing cousin on the phone as it helped me get it done. So after I went and bought more fabric from Walmart I started again. Since Master Roshi’s shirt is supposed to be loose anyway I decided to just go with the biggest size thinking that if needed I could just take it in later. As it ended up I didn’t have to do that and it worked perfectly. When the shirt was done it looked something like this:
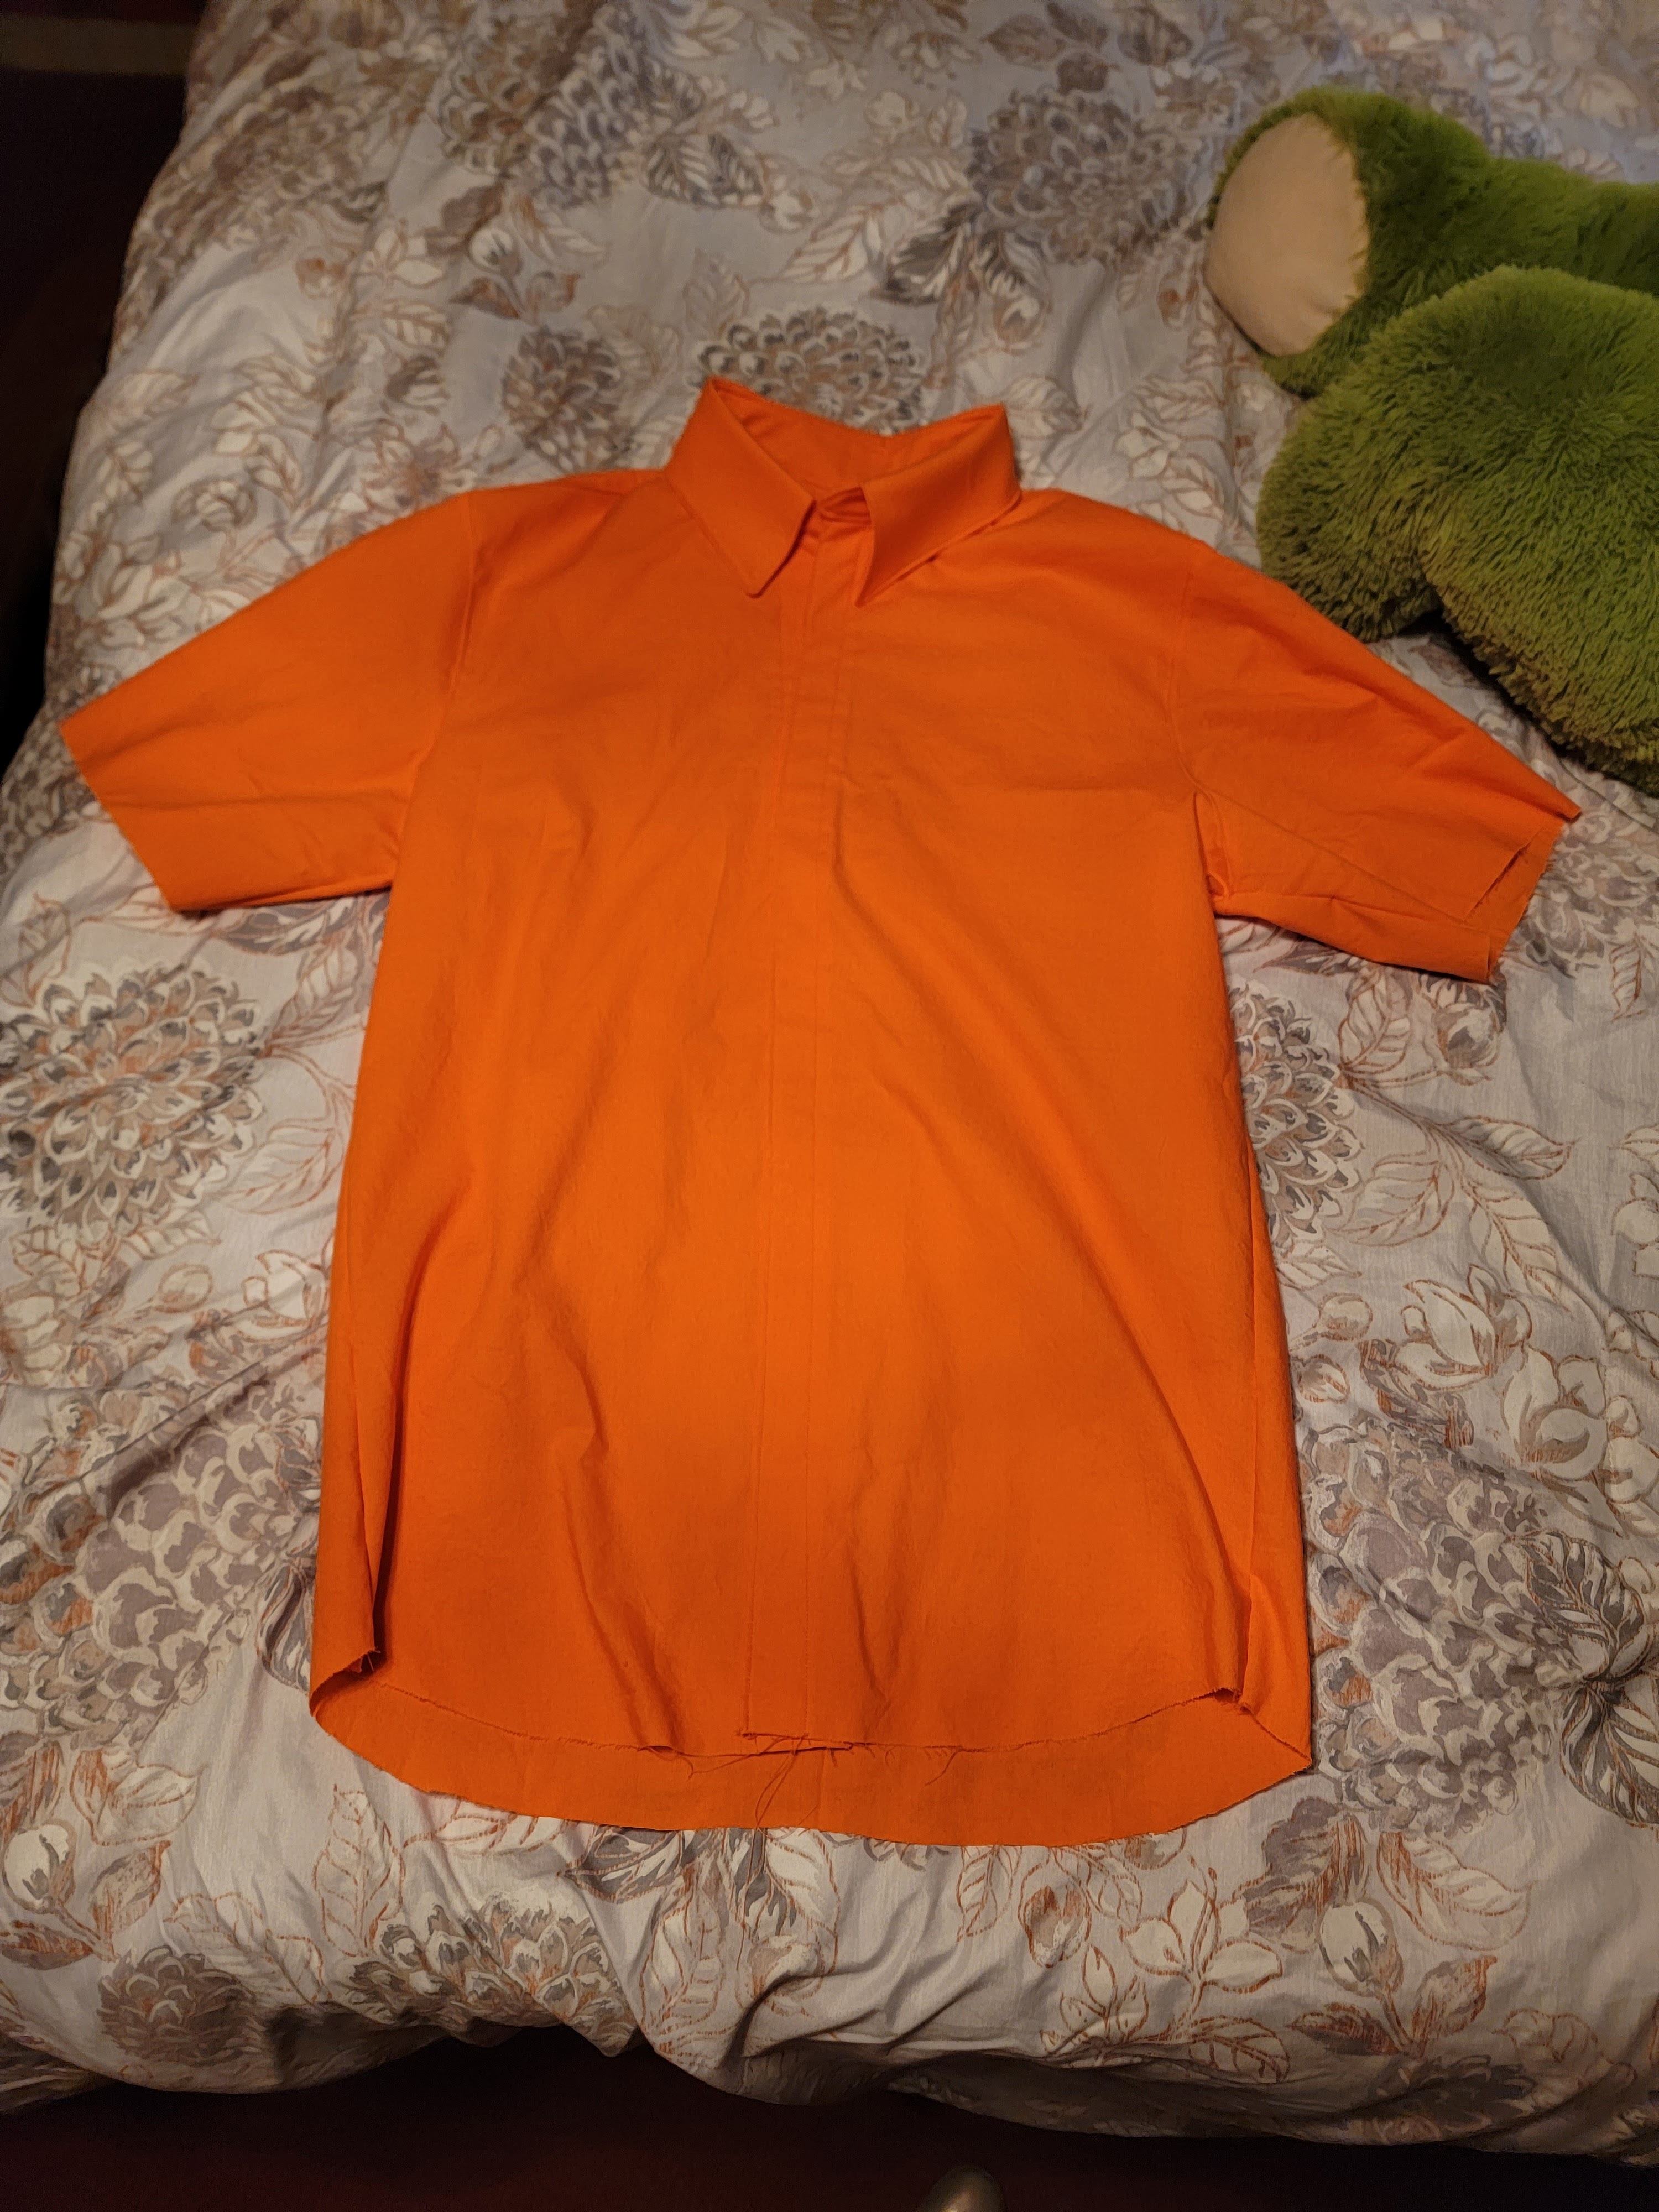
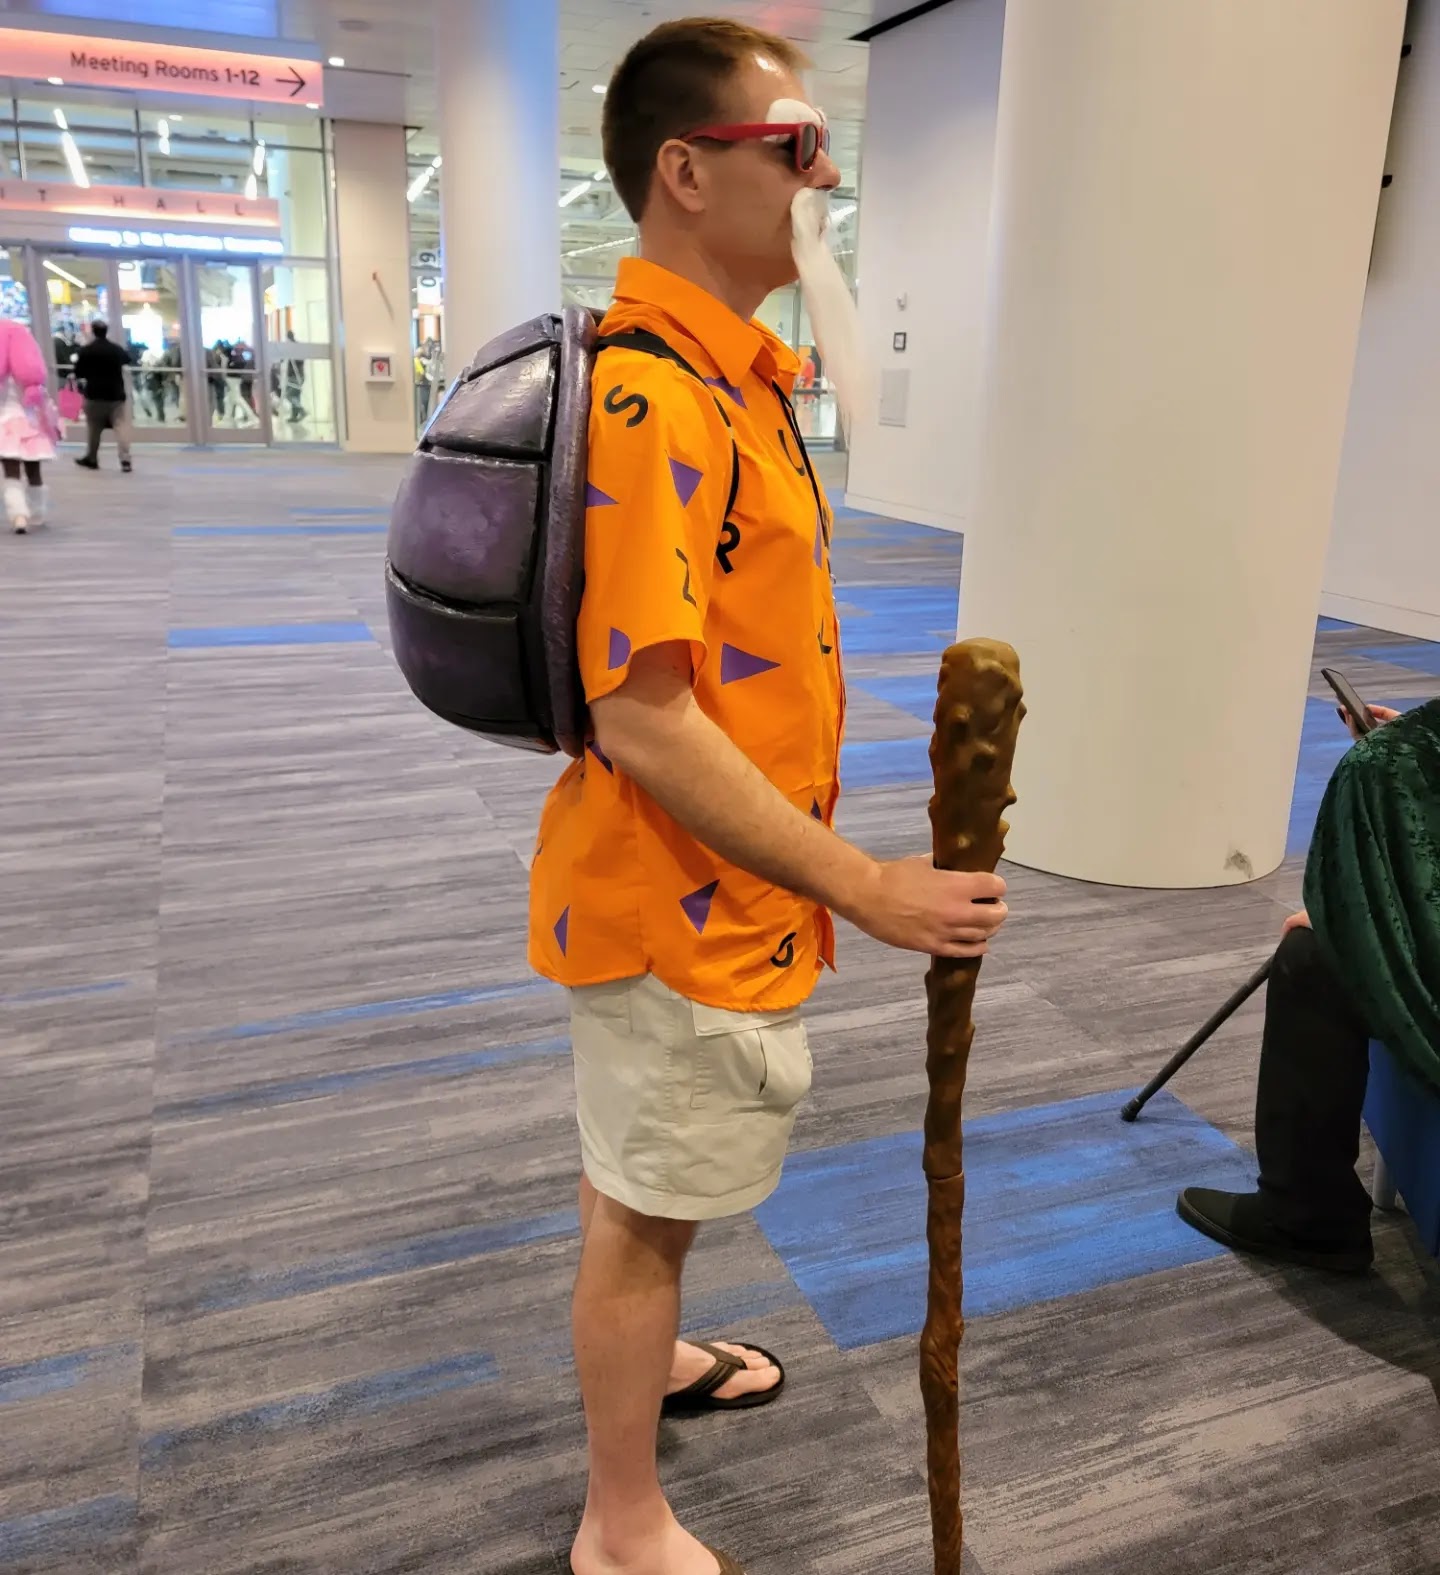
I then used my Cricut to cut out some purple triangles and black letters. I was really fortunate with how Design Space put the triangles as I was able to use not only the ones that I added but also the “negative space” triangles so I didn’t have to cut more. As it ended up with the letters, I needed two cut 1 1/2 sets of the alphabet to cover the entire shirt. I bought some 5/8 white buttons from Hobby Lobby and used the setting on my machine to do the buttonhole.
The Shell
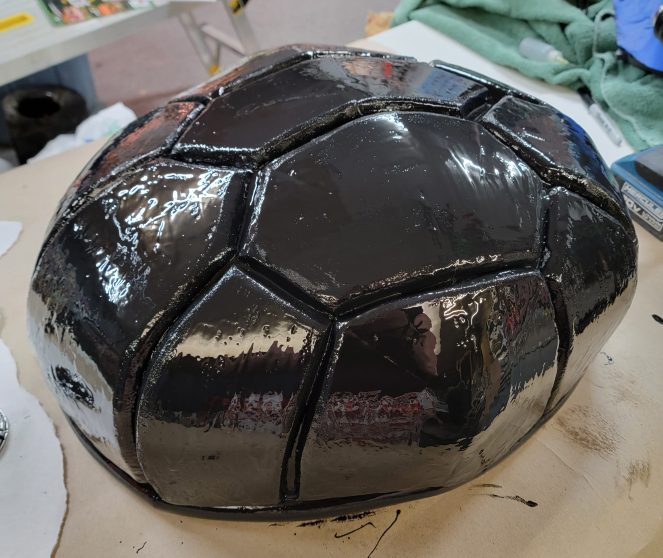
I’m not going to lie, the shell caused me severe anxiety. I had never made anything this big with foam and I was so scared that I was going to ruin it. I only had a month so if something went sideways I did not have a chance to Fix it. I started out trying to find a pattern. I searched the internet trying to find something that I could use. Eventually, I found a EVA foam shell on Etsy for a Mario Cosplay, you can find it here. I bought it quickly and taped the pieces together then cut it out. I quickly realized that this was not going to work for my over 6′ husband as it’s made more for a child or teenager. I started to panic and messaged the seller and she told me how I could adjust the size. With my dad’s help and his handy dandy compass drawing tool, we added 4 inches all the way around and it worked perfectly. The cosplay foam was pretty expensive and since it isn’t Halloween they didn’t carry it at the majority of the craft stores in the area. So for this one, we actually opted for the foam floor mats from Harbor Freight. We used the Weldwood Contact Cement to glue the panels together and traced out altered pattern on the foam and cut it out. (I took inspiration from the video found here for the main construction and top details)This time I wanted to try one of those breakaway blade knives to cut the foam. When making my Ahsoka Tano cosplay I used an X-Acto knife and it was a pain to keep changing the blades. This stuff was much thicker as well and I like that I could adjust it to make the blade long enough to cut in one pass. I glued the darts shut and we had a shell! I bought a white foam dowel rod and cut it in half to use as trim.
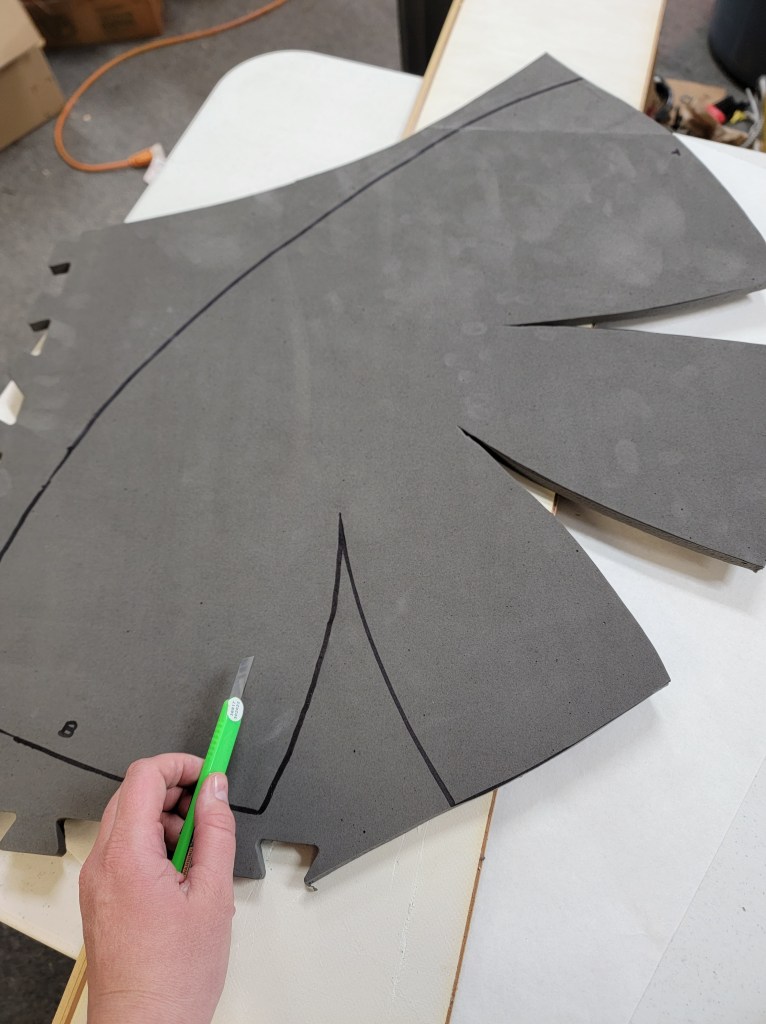


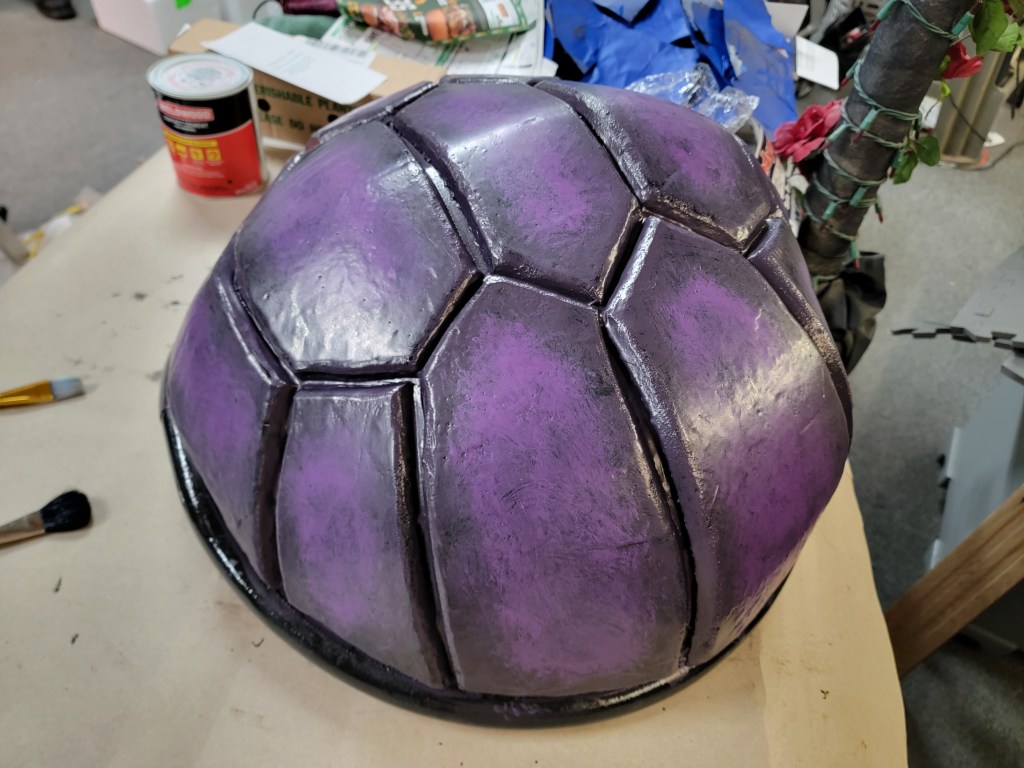
After that, I covered it in painter’s tape. Lesson learned…..if you are doing something this big, use tape that is at least 2.5 inches wide otherwise you will use a whole bunch of tape and get little accomplished. I wanted my husband to be able to participate in this and so I had him draw the lines of how he wanted the raised parts of the shell. Afterward, I cut them and unstuck them from the shell and used the left over foam from the mats to make them. For the areas that were really curved, I made single cuts to great a dart so that they would lay flat on the foam. I then started to glue them to the shell. It took me a morning and afternoon to do all of this with plenty of breaks as I was also sanding the edges to get a rounded and more natural look and the smell of the glue got to me a couple of times. I let it completely cure then I hit it with the heat gun to seal the foam. Now it was time to seal it again. Admittedly what I used, I would never use again but I bought a can of flex seal rubber sealer for roofs and figured I would just paint it on. For the Ahsoka costume, I used a spray but it’s winter time and we kept getting snow or rain and I thought it would add texture. Well… it was a pair to work with and this stuff took 3 days to fully cure. It was also incredibly thick and liked to run, but hey that’s even more texture, right? When that was finally all done and cured it was time to paint. I used some of the Flexible FX paint in purple at Hobby Lobby. It just so happened to be on clearance for 86 cents so that was a major win. I mixed it with some black FX paint I had left over and painted it in between the raised parts of the shell and on the edges. After that dried, I took the straight purple and put blended it around the edges, and applied it to the middle. Then mixed the purple with some white to get a lighter shade and use a natural sponge to apply it to the very center or the parts that stuck out for highlights.

The last part I had to worry about was how we were going to make it wearable. This was difficult because I wanted something he could take off for panels easily and if he dropped something I wanted it to have enough give to stretch. As it ended up we were able to upcycle some old dress suspenders and hot glued them to the inside. This allowed the straps to even be adjustable and comfortable all day.
So that’s pretty much it for this costume. He loved it and got so many pictures with different people and those Dragon Ball Z cosplays and best of all it was comfortable and affordable. If you have any questions don’t be afraid to let me know! Thanks for joining me today!
